In this blog, I will show the procedure of how to use ReadWriteMany (RWM) volumes on vSphere with Tanzu
What is ReadyWriteMany Volumes
They are volumes that can simultaneously be mounted in a Read/Write fashion into several pods. This is particularly useful for web & app servers that serve the same files – but also for CI systems like Jenkins which can use a shared volume for artifact storage rather than unnecessarily duplicating data and impacting CI performance.

Procedure
At a high level, we will be executing the following steps
- Enable vSAN File Service
- Configure vSAN File Service
- Activate File Volume Support on vSphere with Tanzu Supervisor
- Provision RWM persistent volume in TKGs cluster
Step 1 – Enable vSAN File Service
Navigate to the vSAN cluster and click Configure > vSAN > Services. On the File Service row, click Enable.
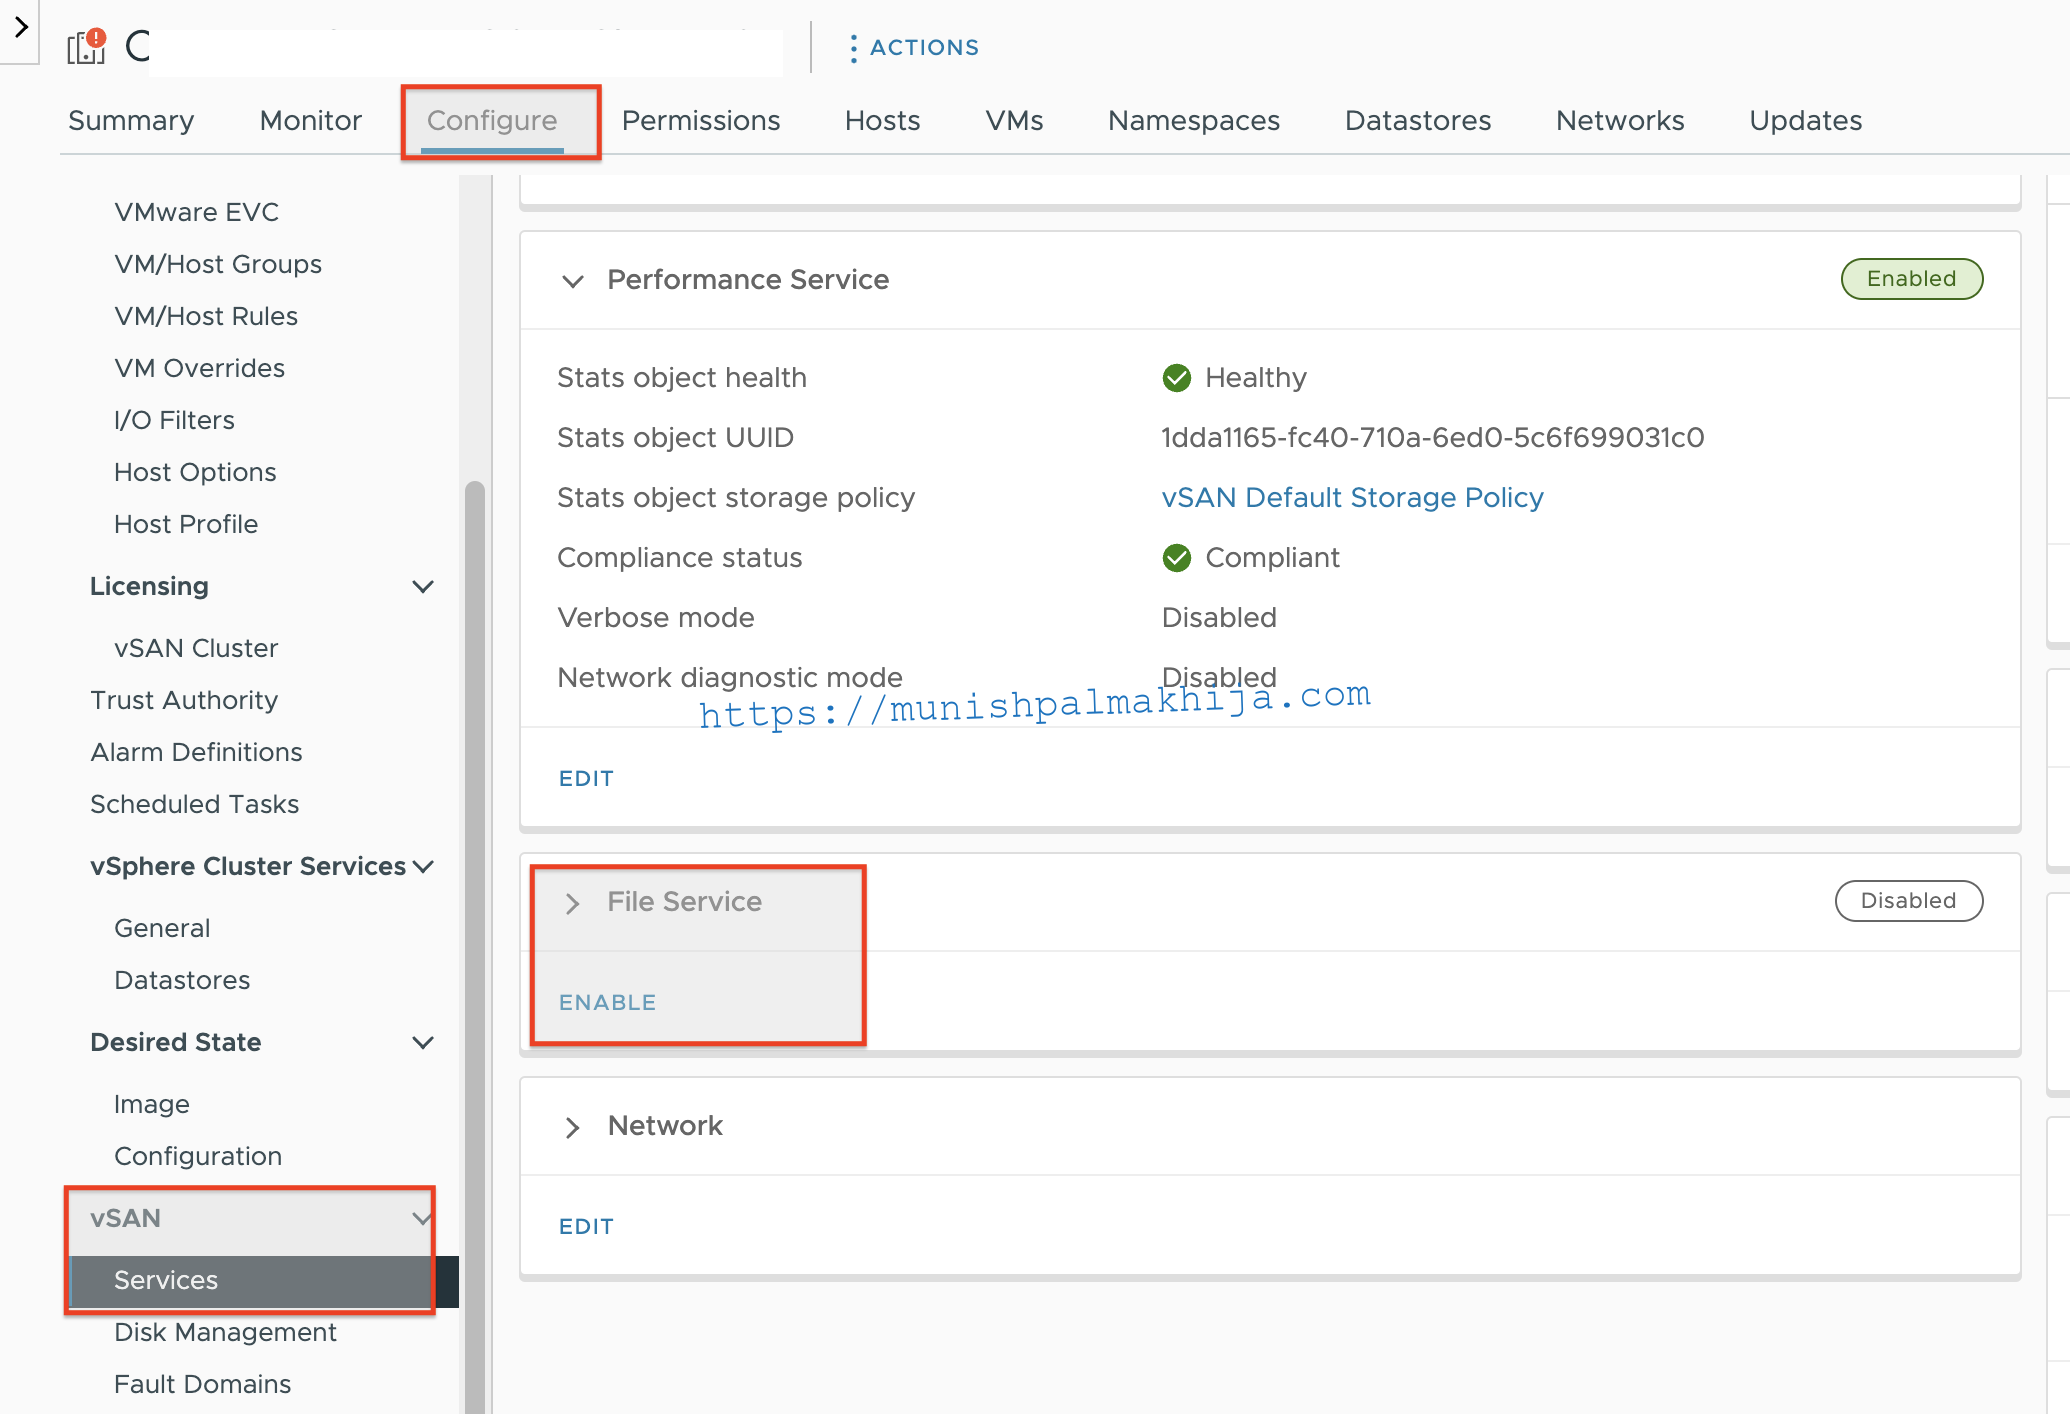
This should open the “Enable File Service” wizard
Select the Network & the procedure to deploy OVF under File Service Agent
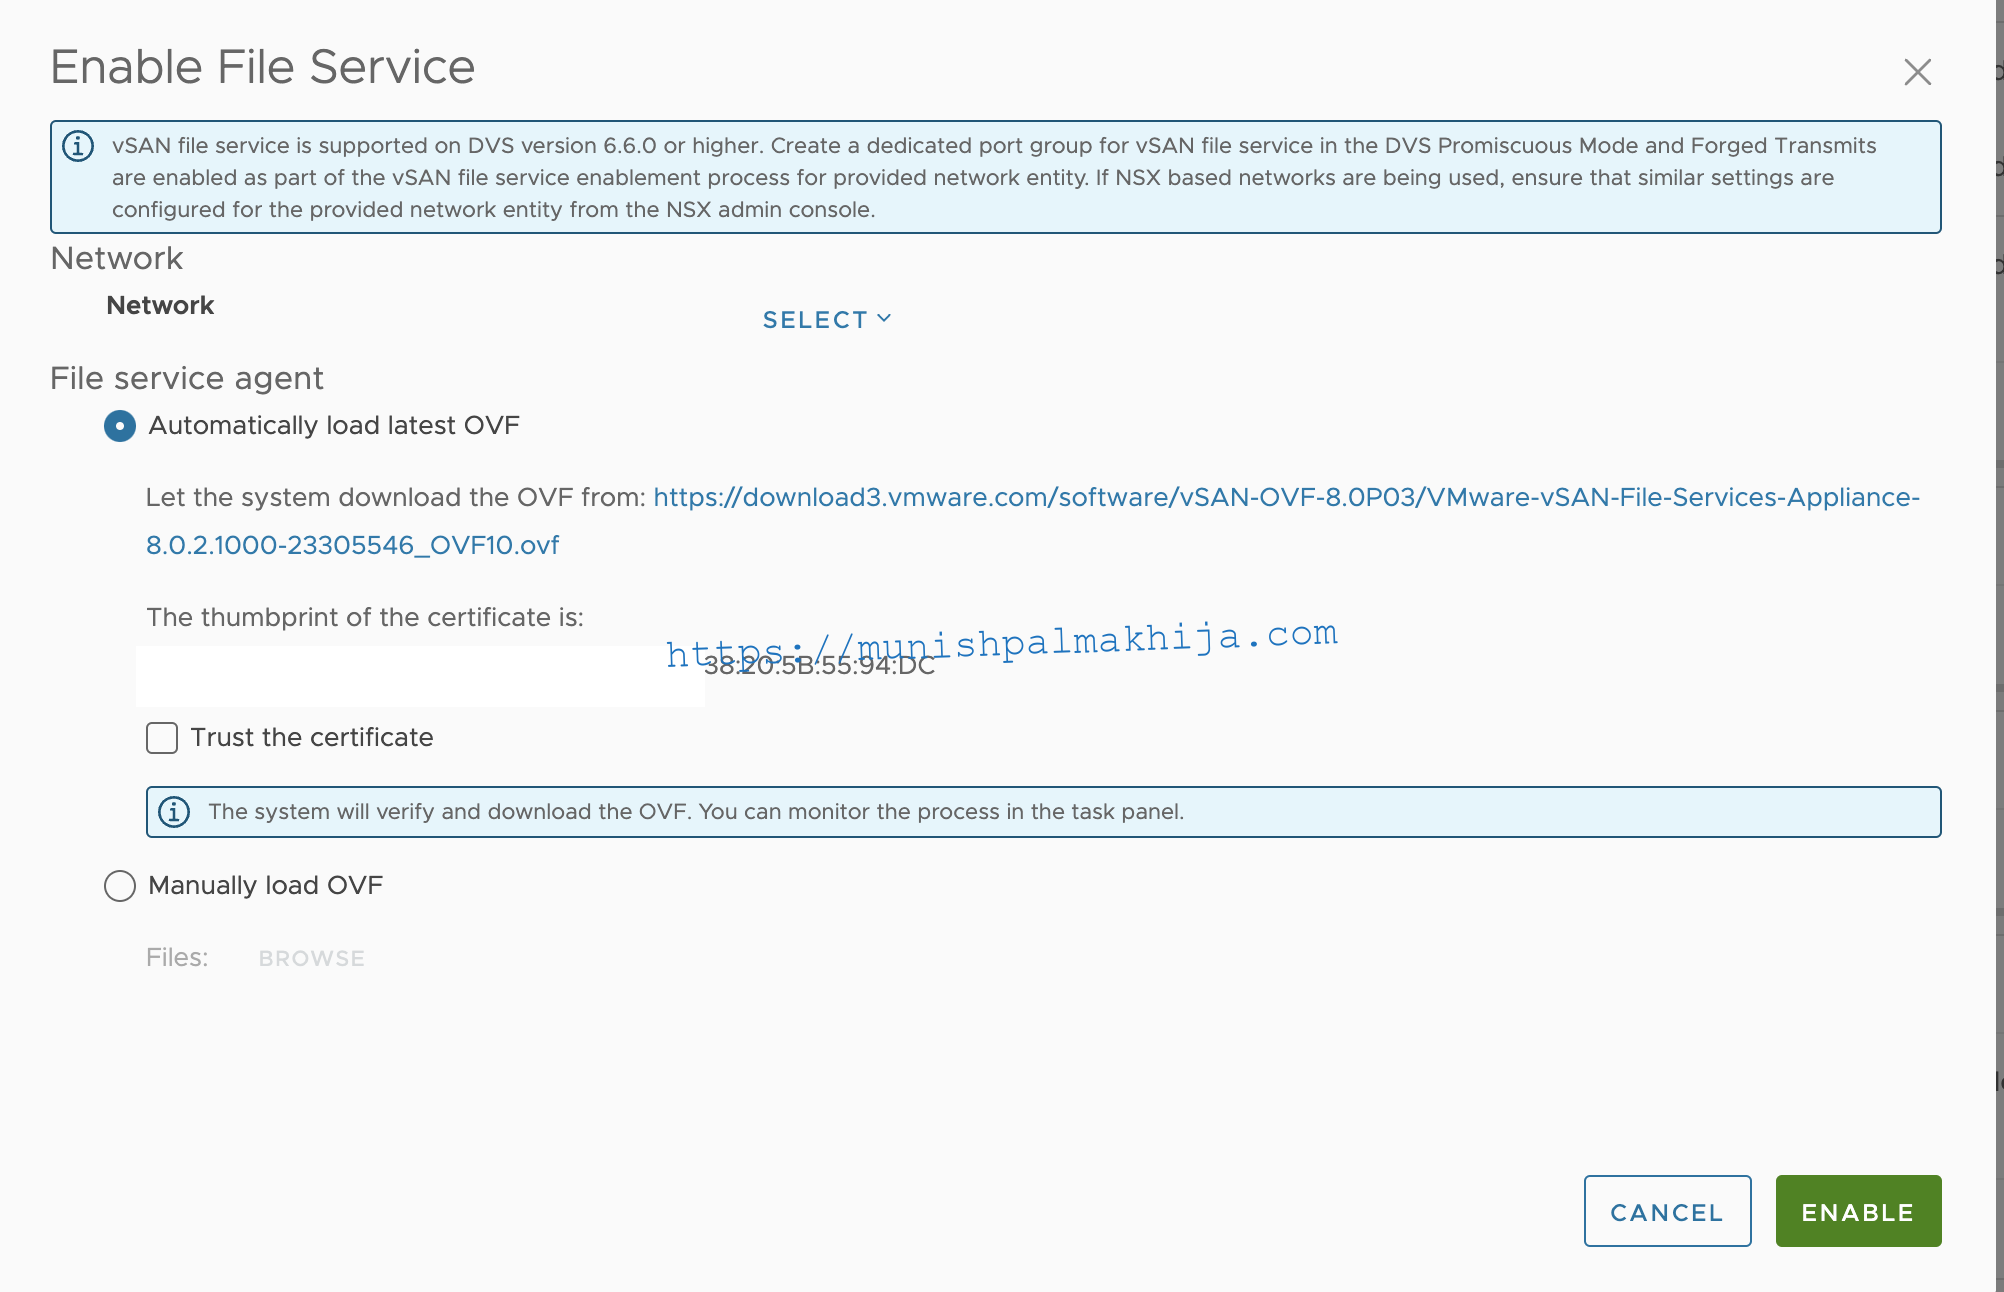
It will trigger the deployment of OVF. A File Services VM (FSVM) is placed on each host
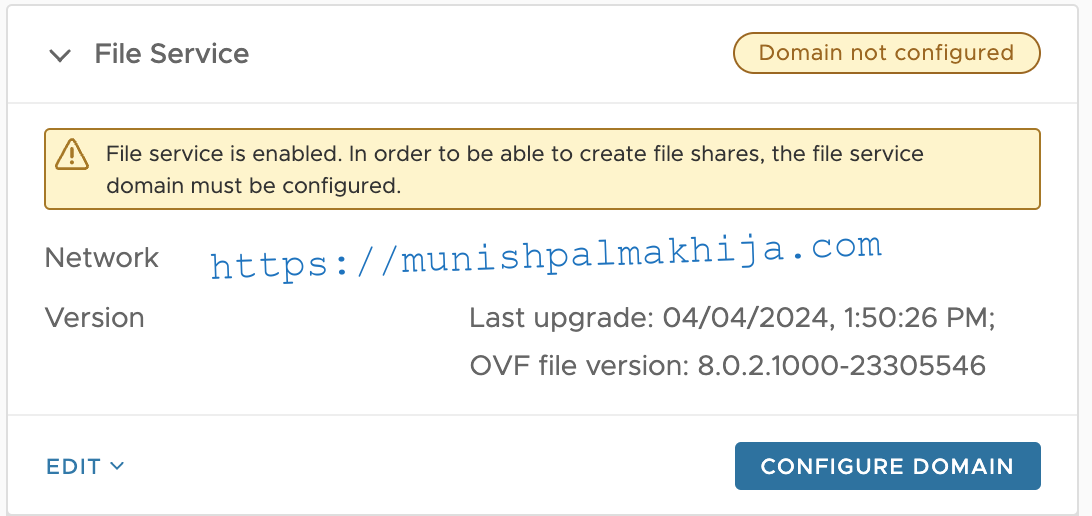
Step 2 – Configure vSAN File Service
Navigate to the vSAN cluster and click Configure > vSAN > Services.
On the File Service row, click Configure Domain
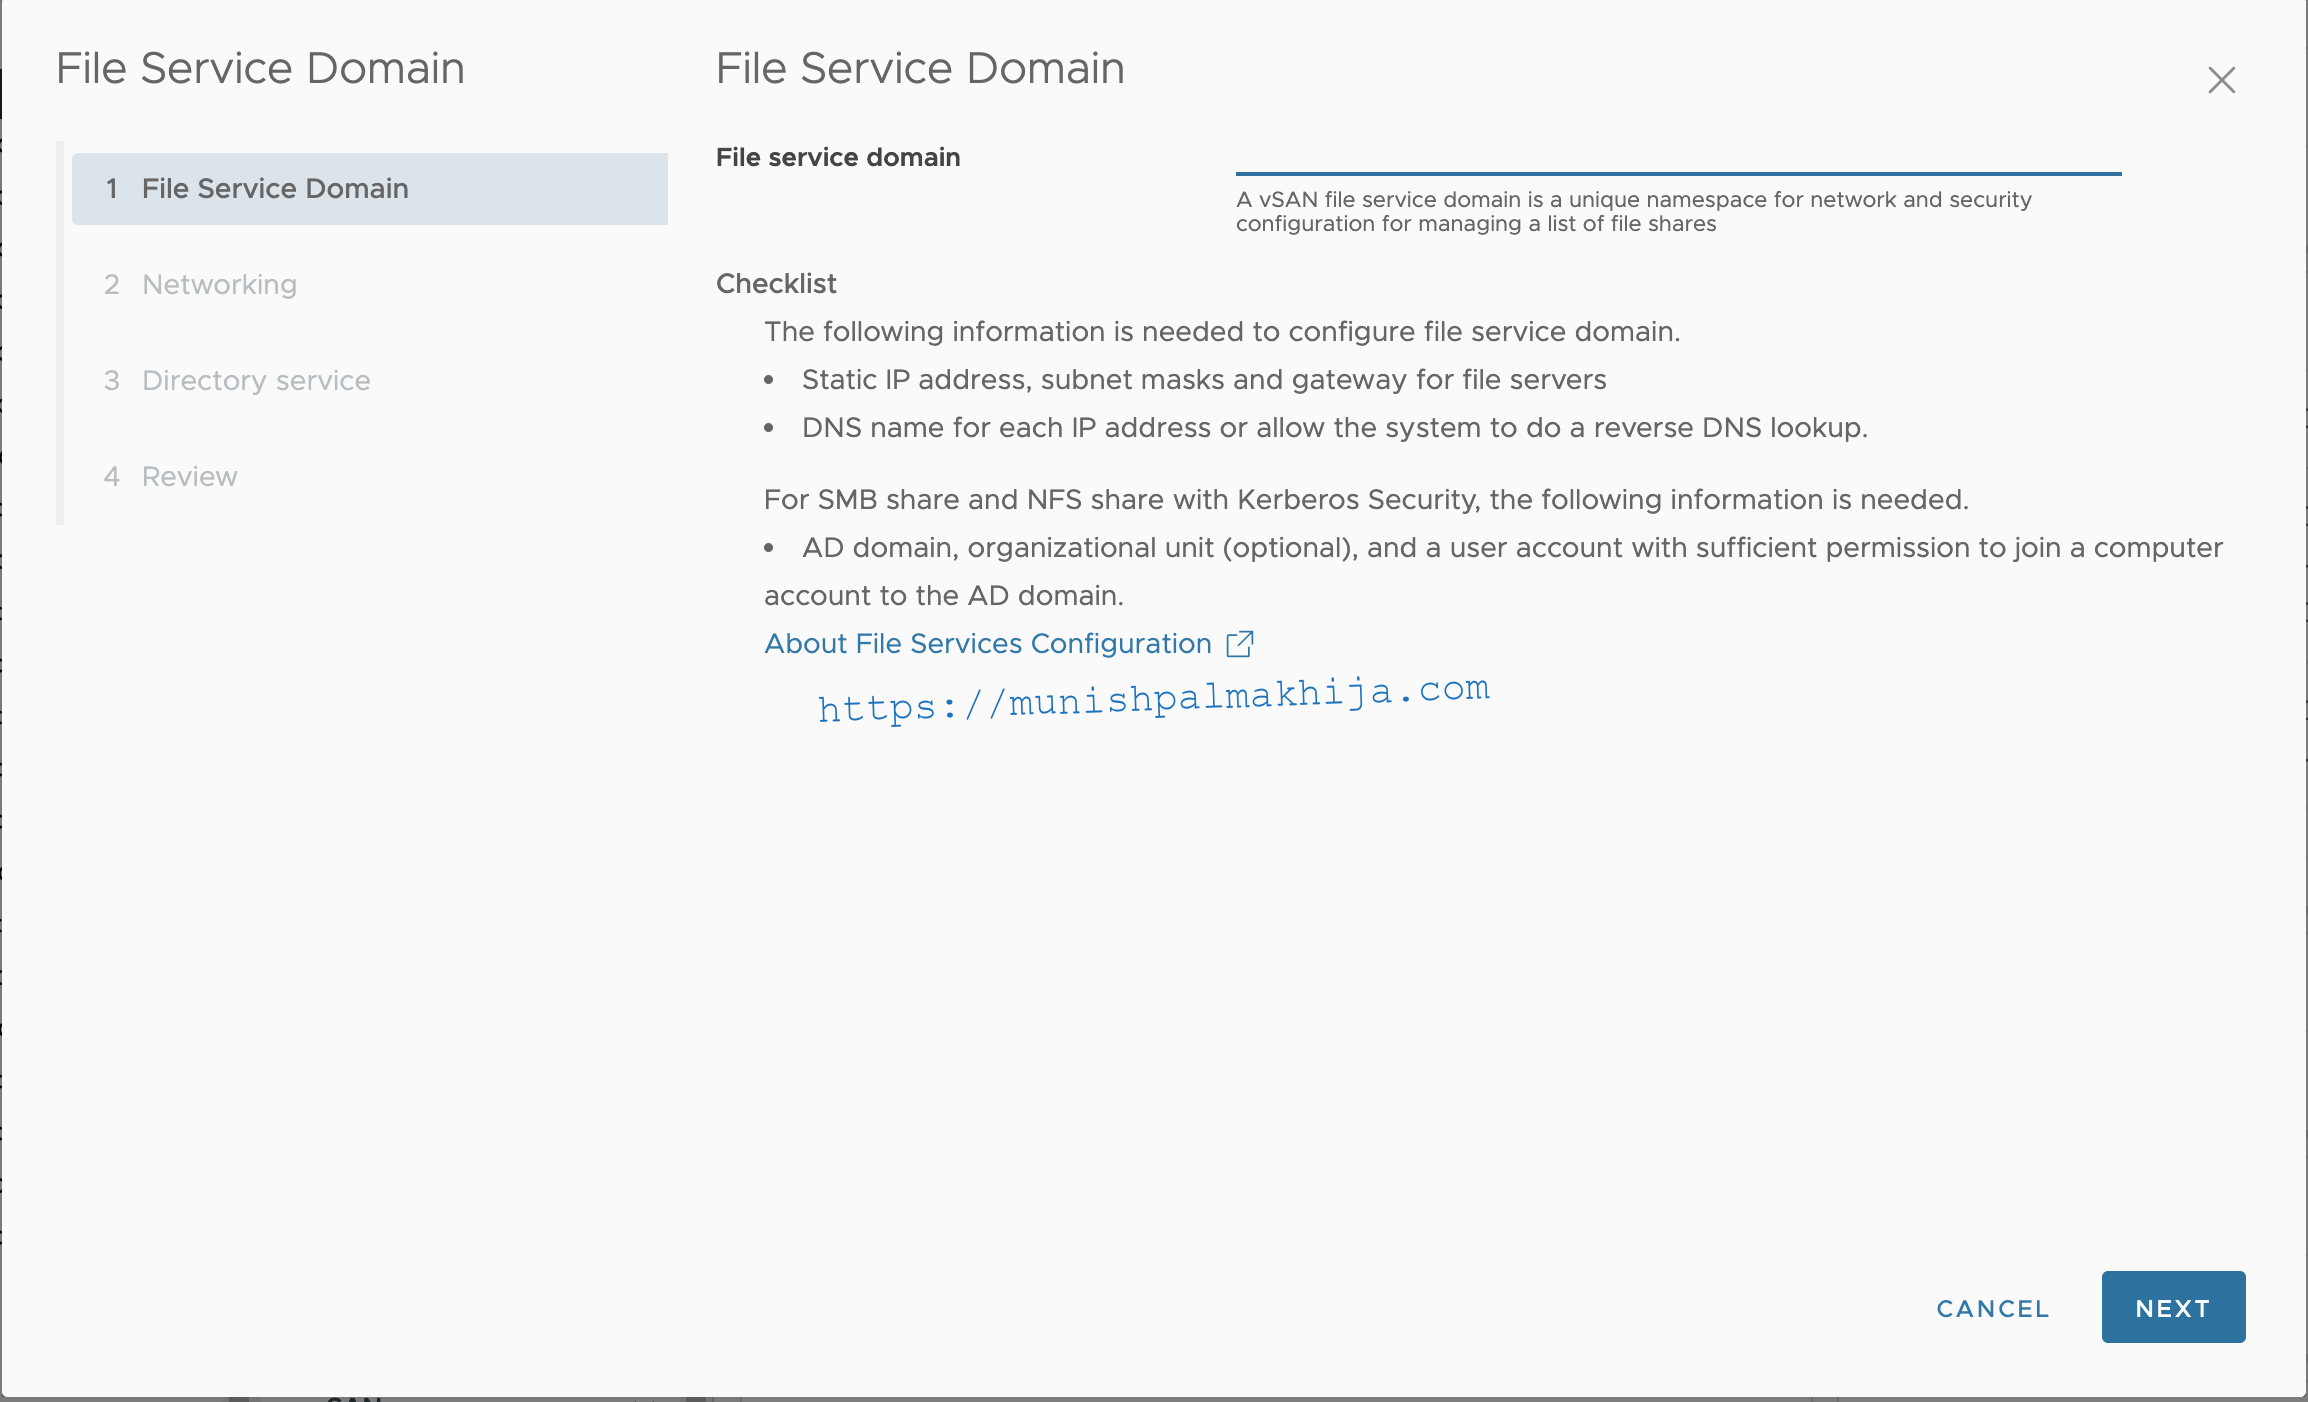
Enter the unique namespace in the File service domain page and click Next.
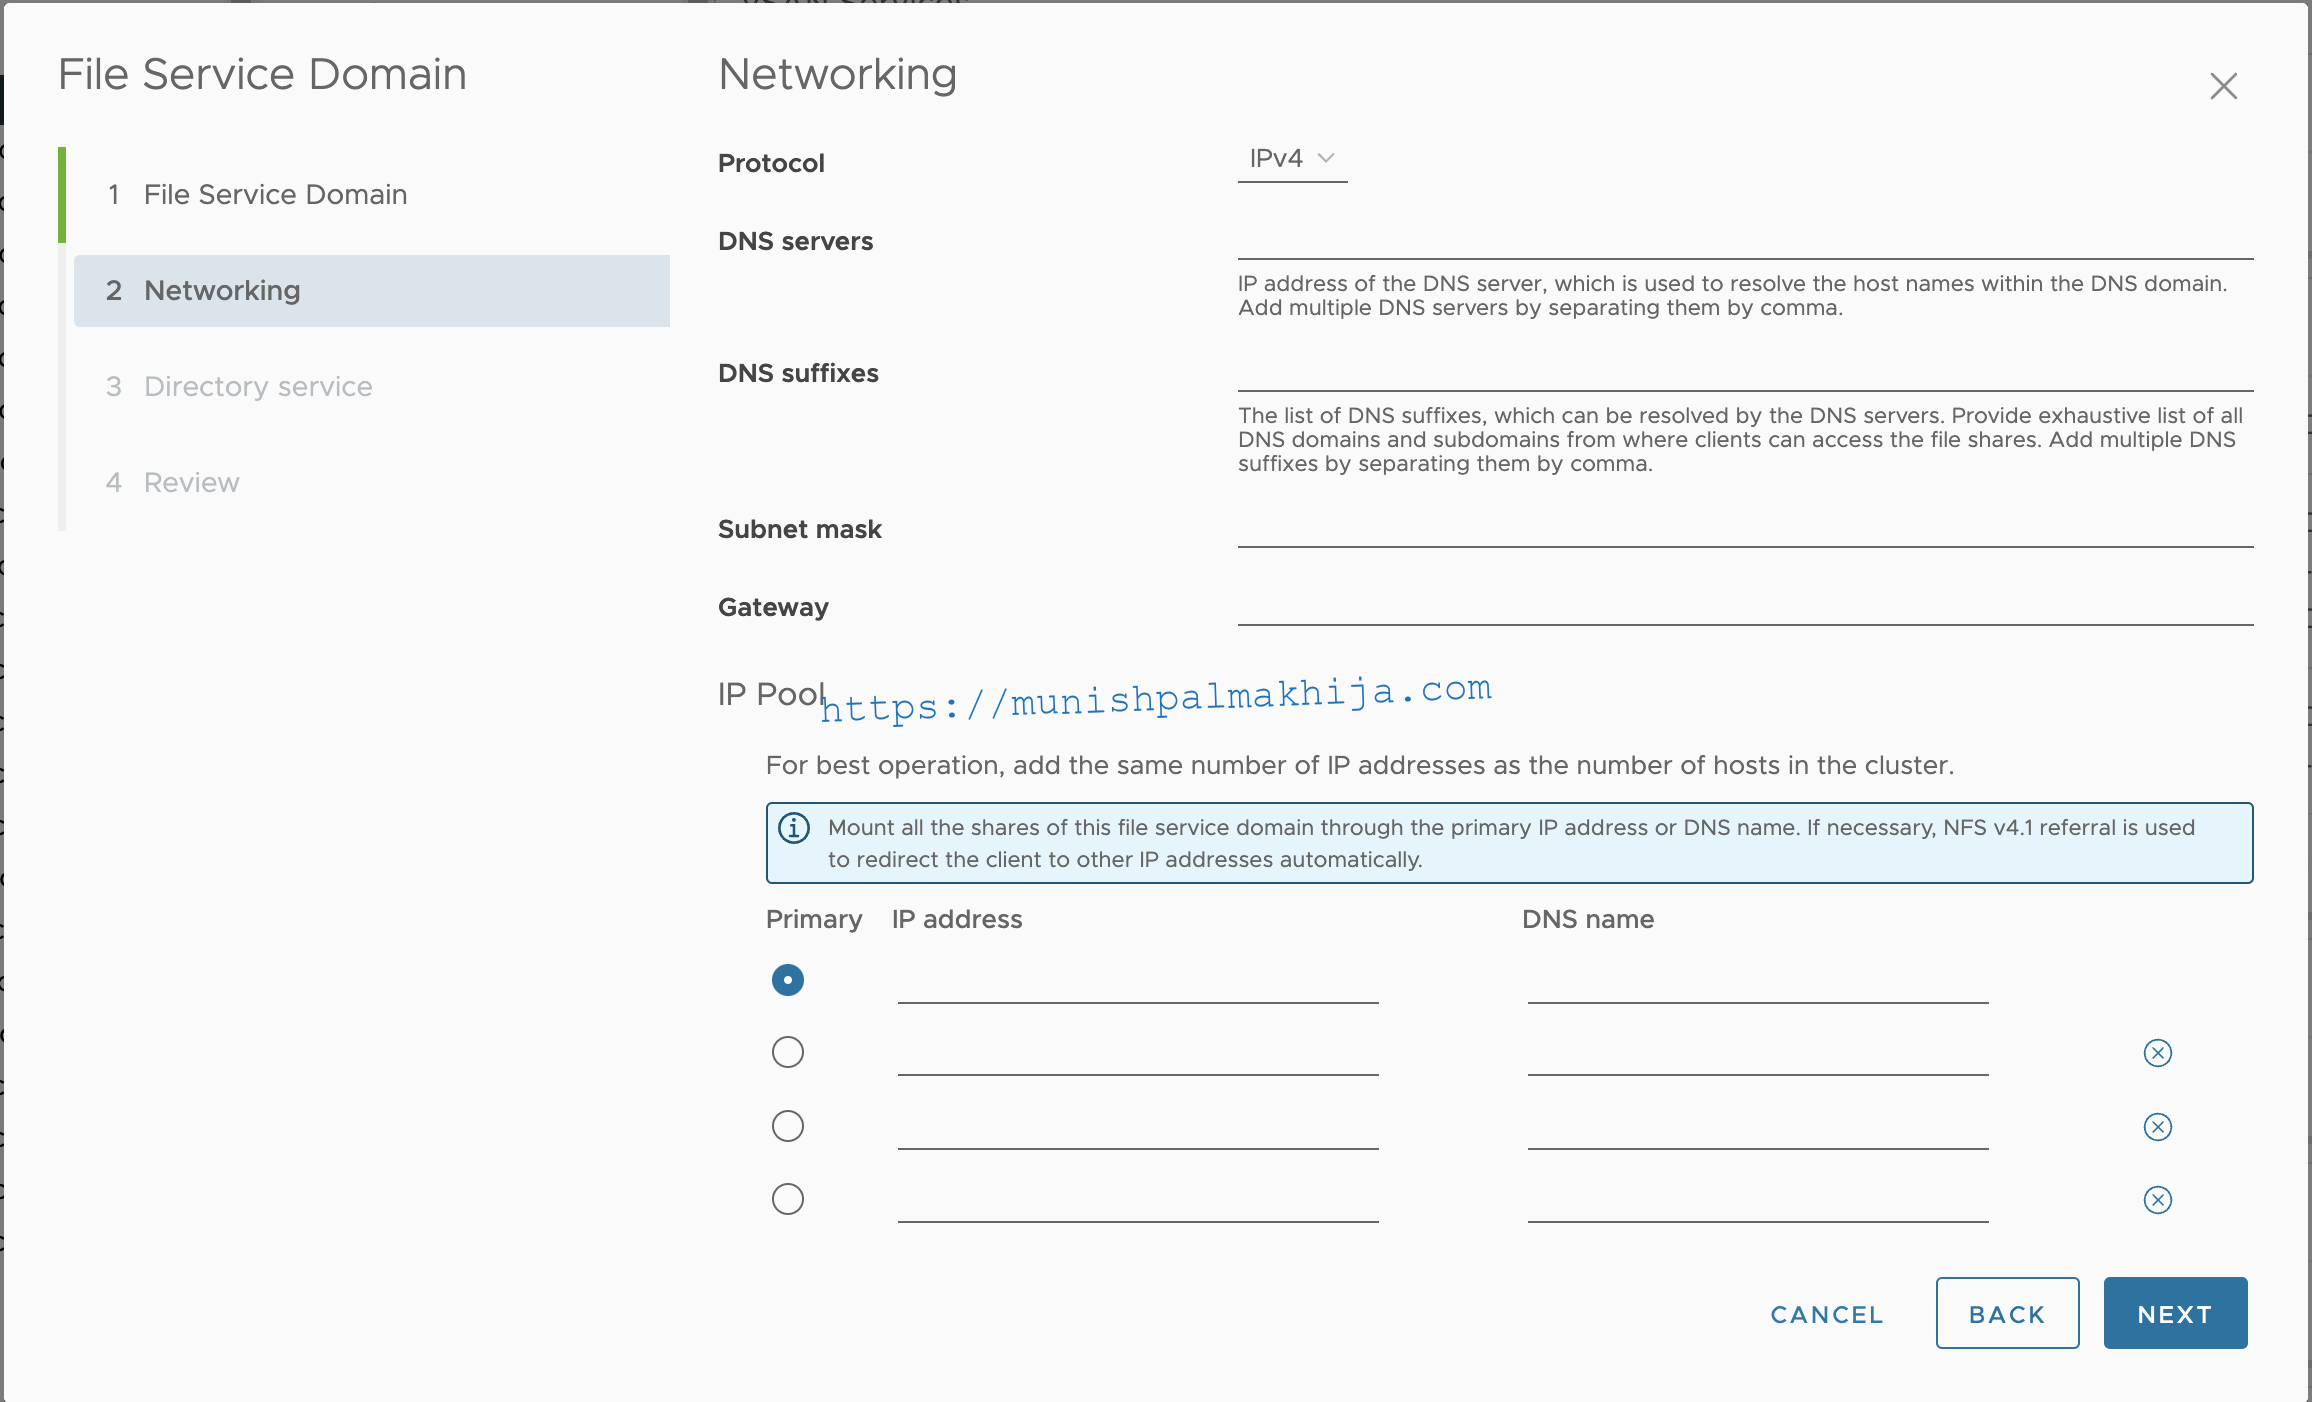
On the Networking page, enter the following information, and click Next
Specify the networking details such as IP Pool (IP & DNS), DNS server, Subnet Mas, Gateway, etc
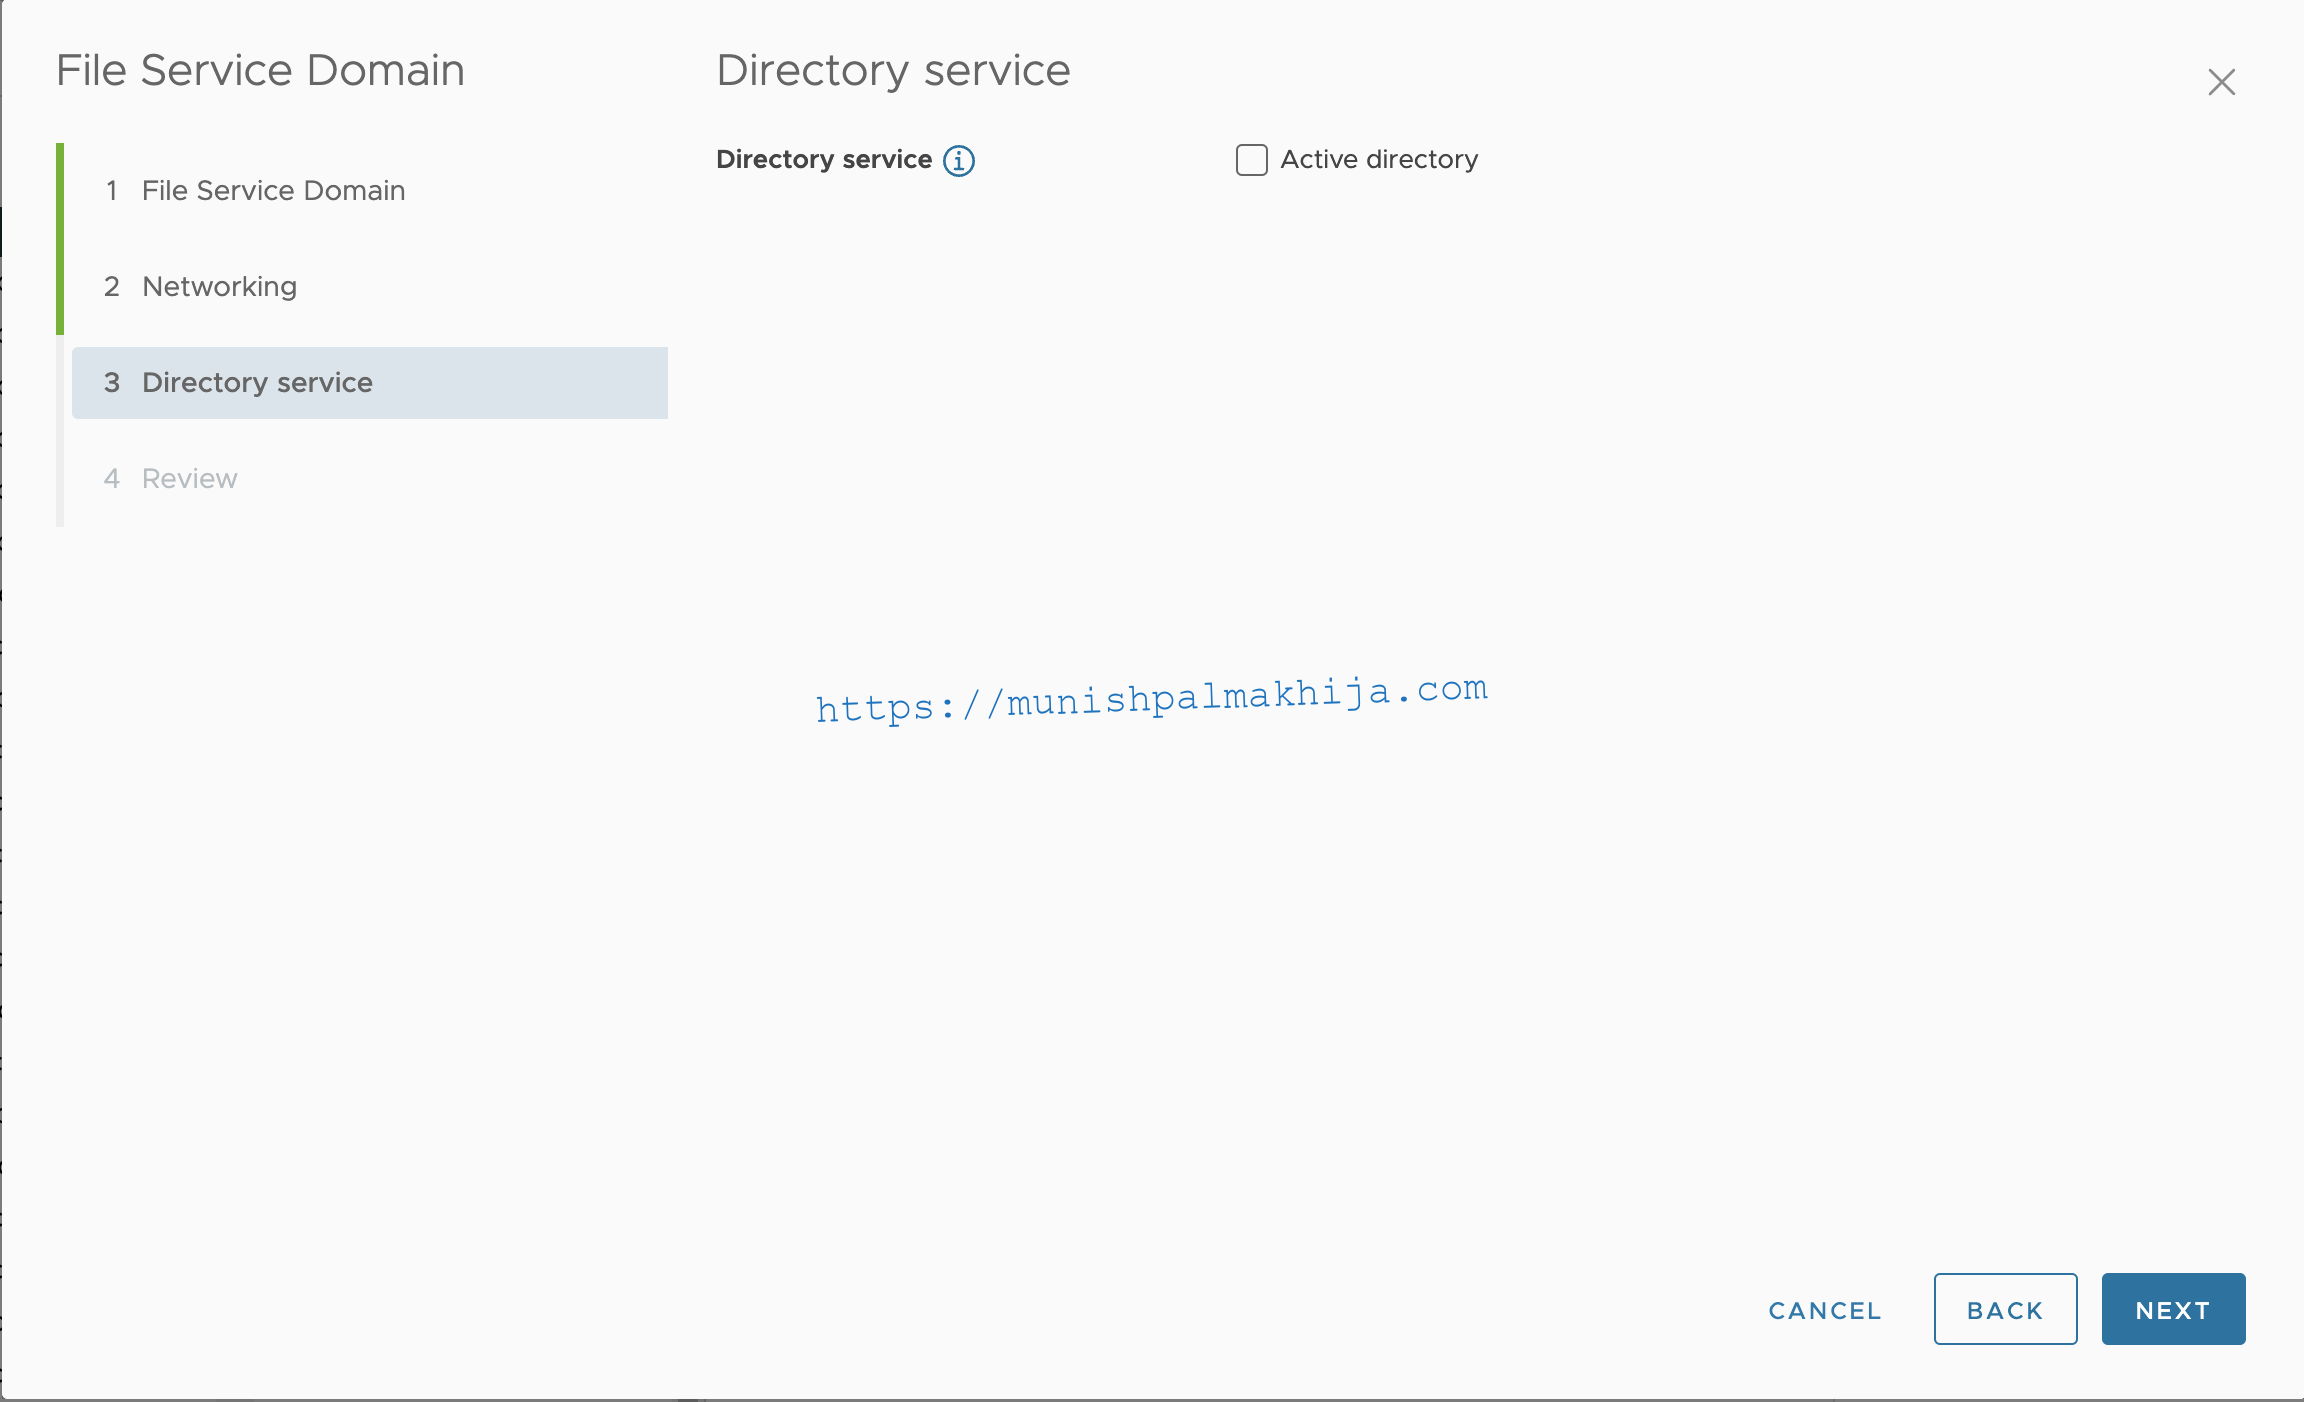
In the Directory service page, Click Next as we will not be configuring this for the Shares
Review the settings and click Finish.
Once successful the file service domain is configured. File servers are started with the IP addresses that were assigned during the vSAN File Service configuration
Step 3 – Activate File Volume Support on vSphere with Tanzu Supervisor
Navigate to Workload Management. Click the Supervisors tab and select the Supervisor to edit from the list.
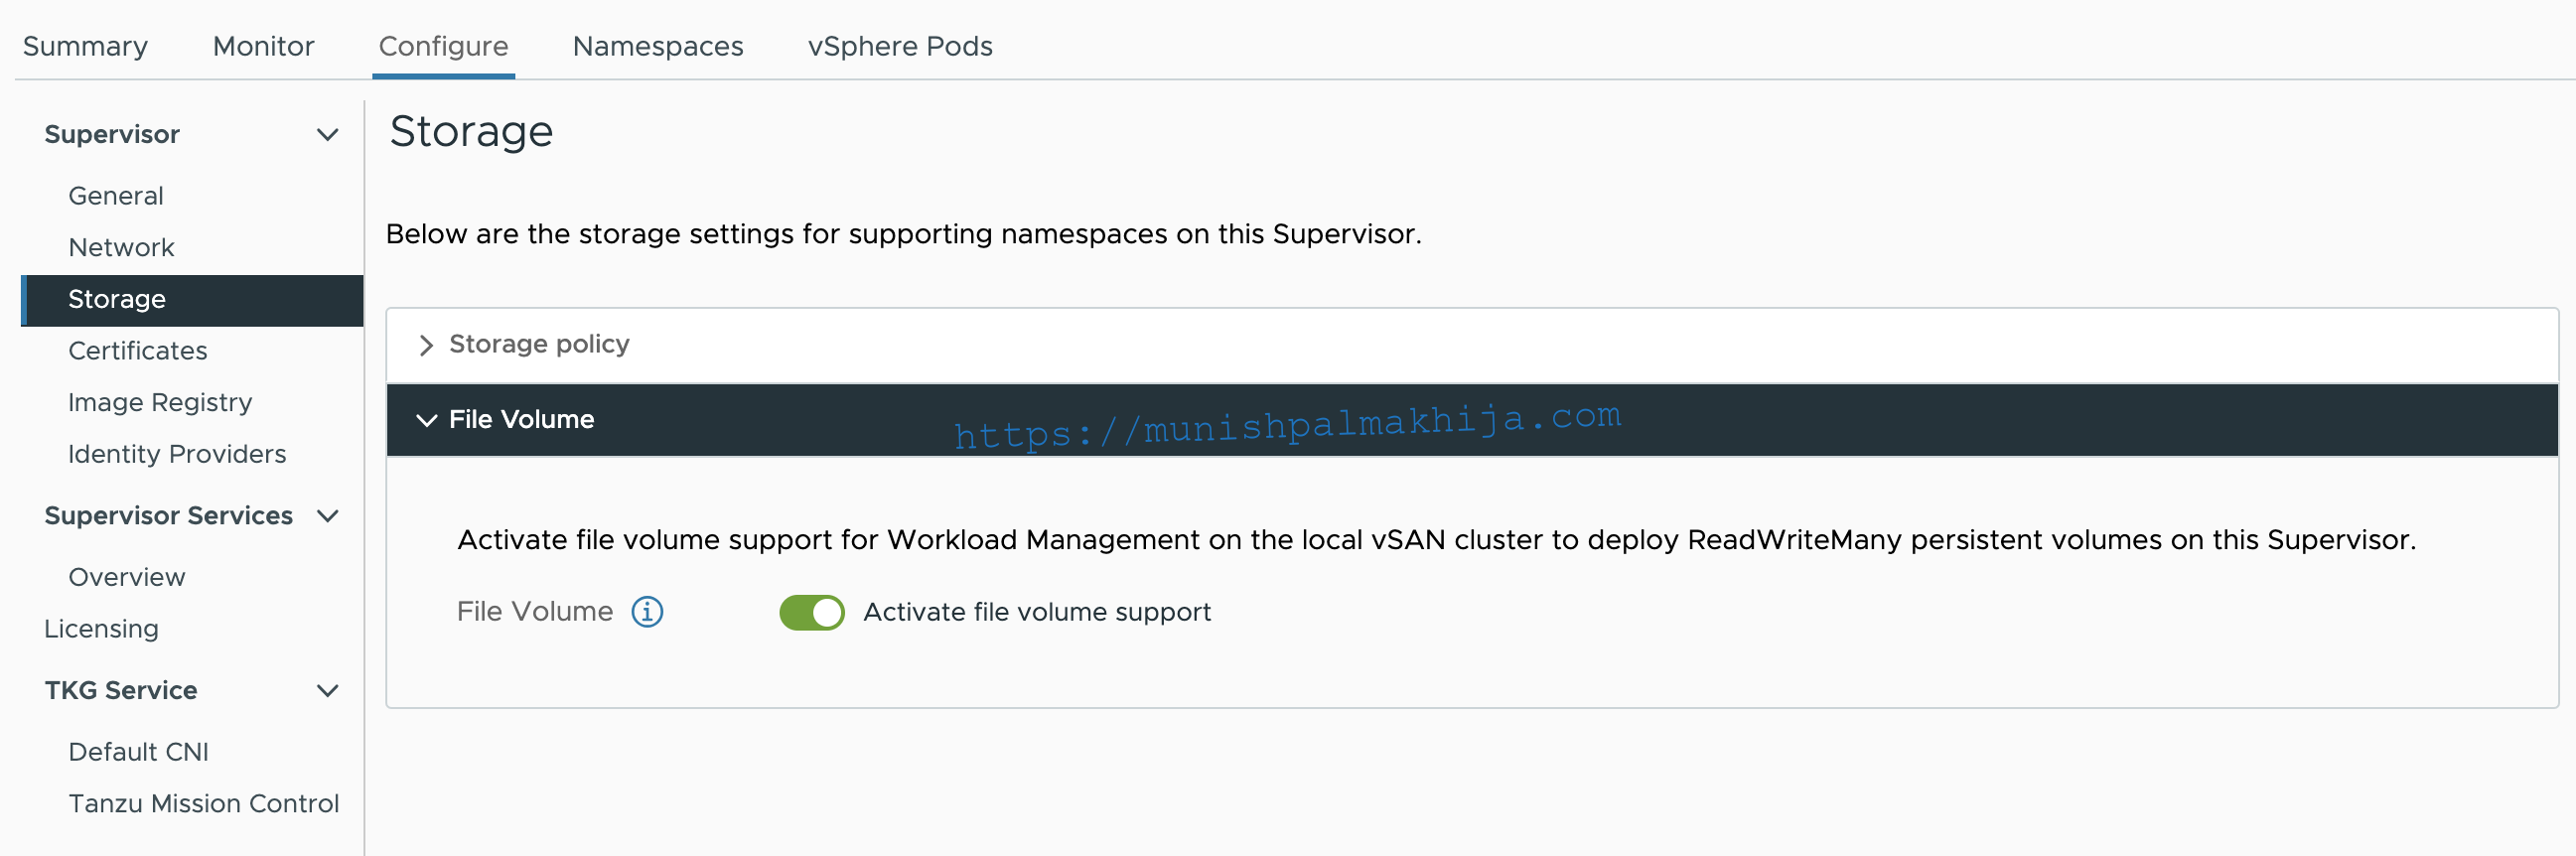
Click the Configure tab and click Storage
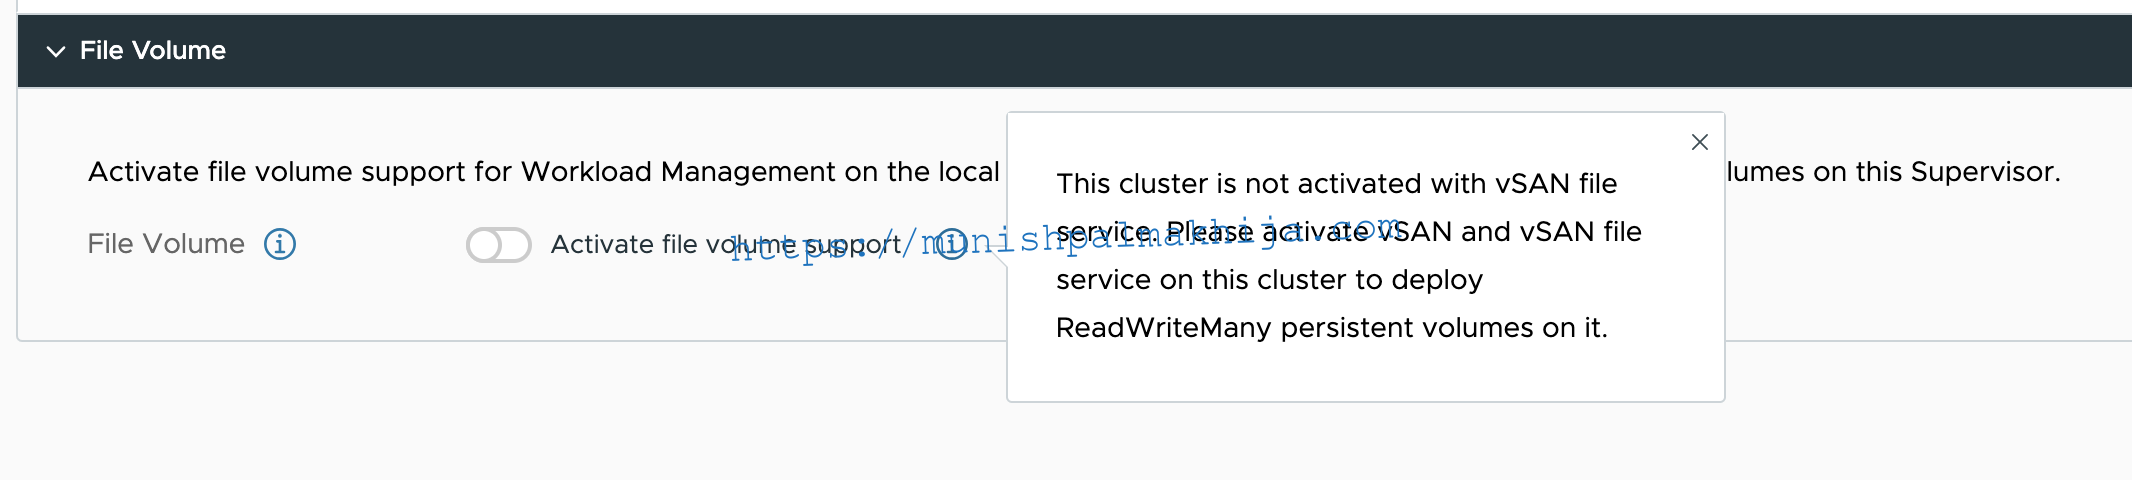
Enable file volume support to deploy ReadWriteMany persistent volumes (This option is available only if your environment has been configured with vSAN File Service.)
Step 4 – Provision RWM persistent volume in TKGs cluster
Create the ReadWriteMany Volumes
kubectl apply -f- << EOF
apiVersion: v1
kind: PersistentVolumeClaim
metadata:
name: pvc-rwm
spec:
accessModes:
– ReadWriteMany
storageClassName: vsan-default-storage-policy
resources:
requests:
storage: 100M
EOF
Create Deployment to mount the ReadWriteMany Volumes
kubectl apply -f- << EOF
apiVersion: apps/v1
kind: Deployment
metadata:
name: wrx-busybox
namespace: default
spec:
progressDeadlineSeconds: 600
replicas: 2
selector:
matchLabels:
run: busybox
template:
metadata:
labels:
run: busybox
spec:
containers:
– args:
– sh
image: gcr.io/google_containers/busybox:1.24
imagePullPolicy: Always
name: busybox
stdin: true
tty: true
volumeMounts:
– name: pvc1
mountPath: “/mnt1”
restartPolicy: Always
volumes:
– name: pvc1
persistentVolumeClaim:
claimName: pvc-rwm
EOF
Verify the mount in the pod
In the above example, you should see a mount named mnt1
k attach -it wrx-busybox-d65f5b796-lvz2v -c busybox
If you don’t see a command prompt, try pressing enter.
/ # df | grep mnt1
98304 0 0 0% /mnt1
/ #
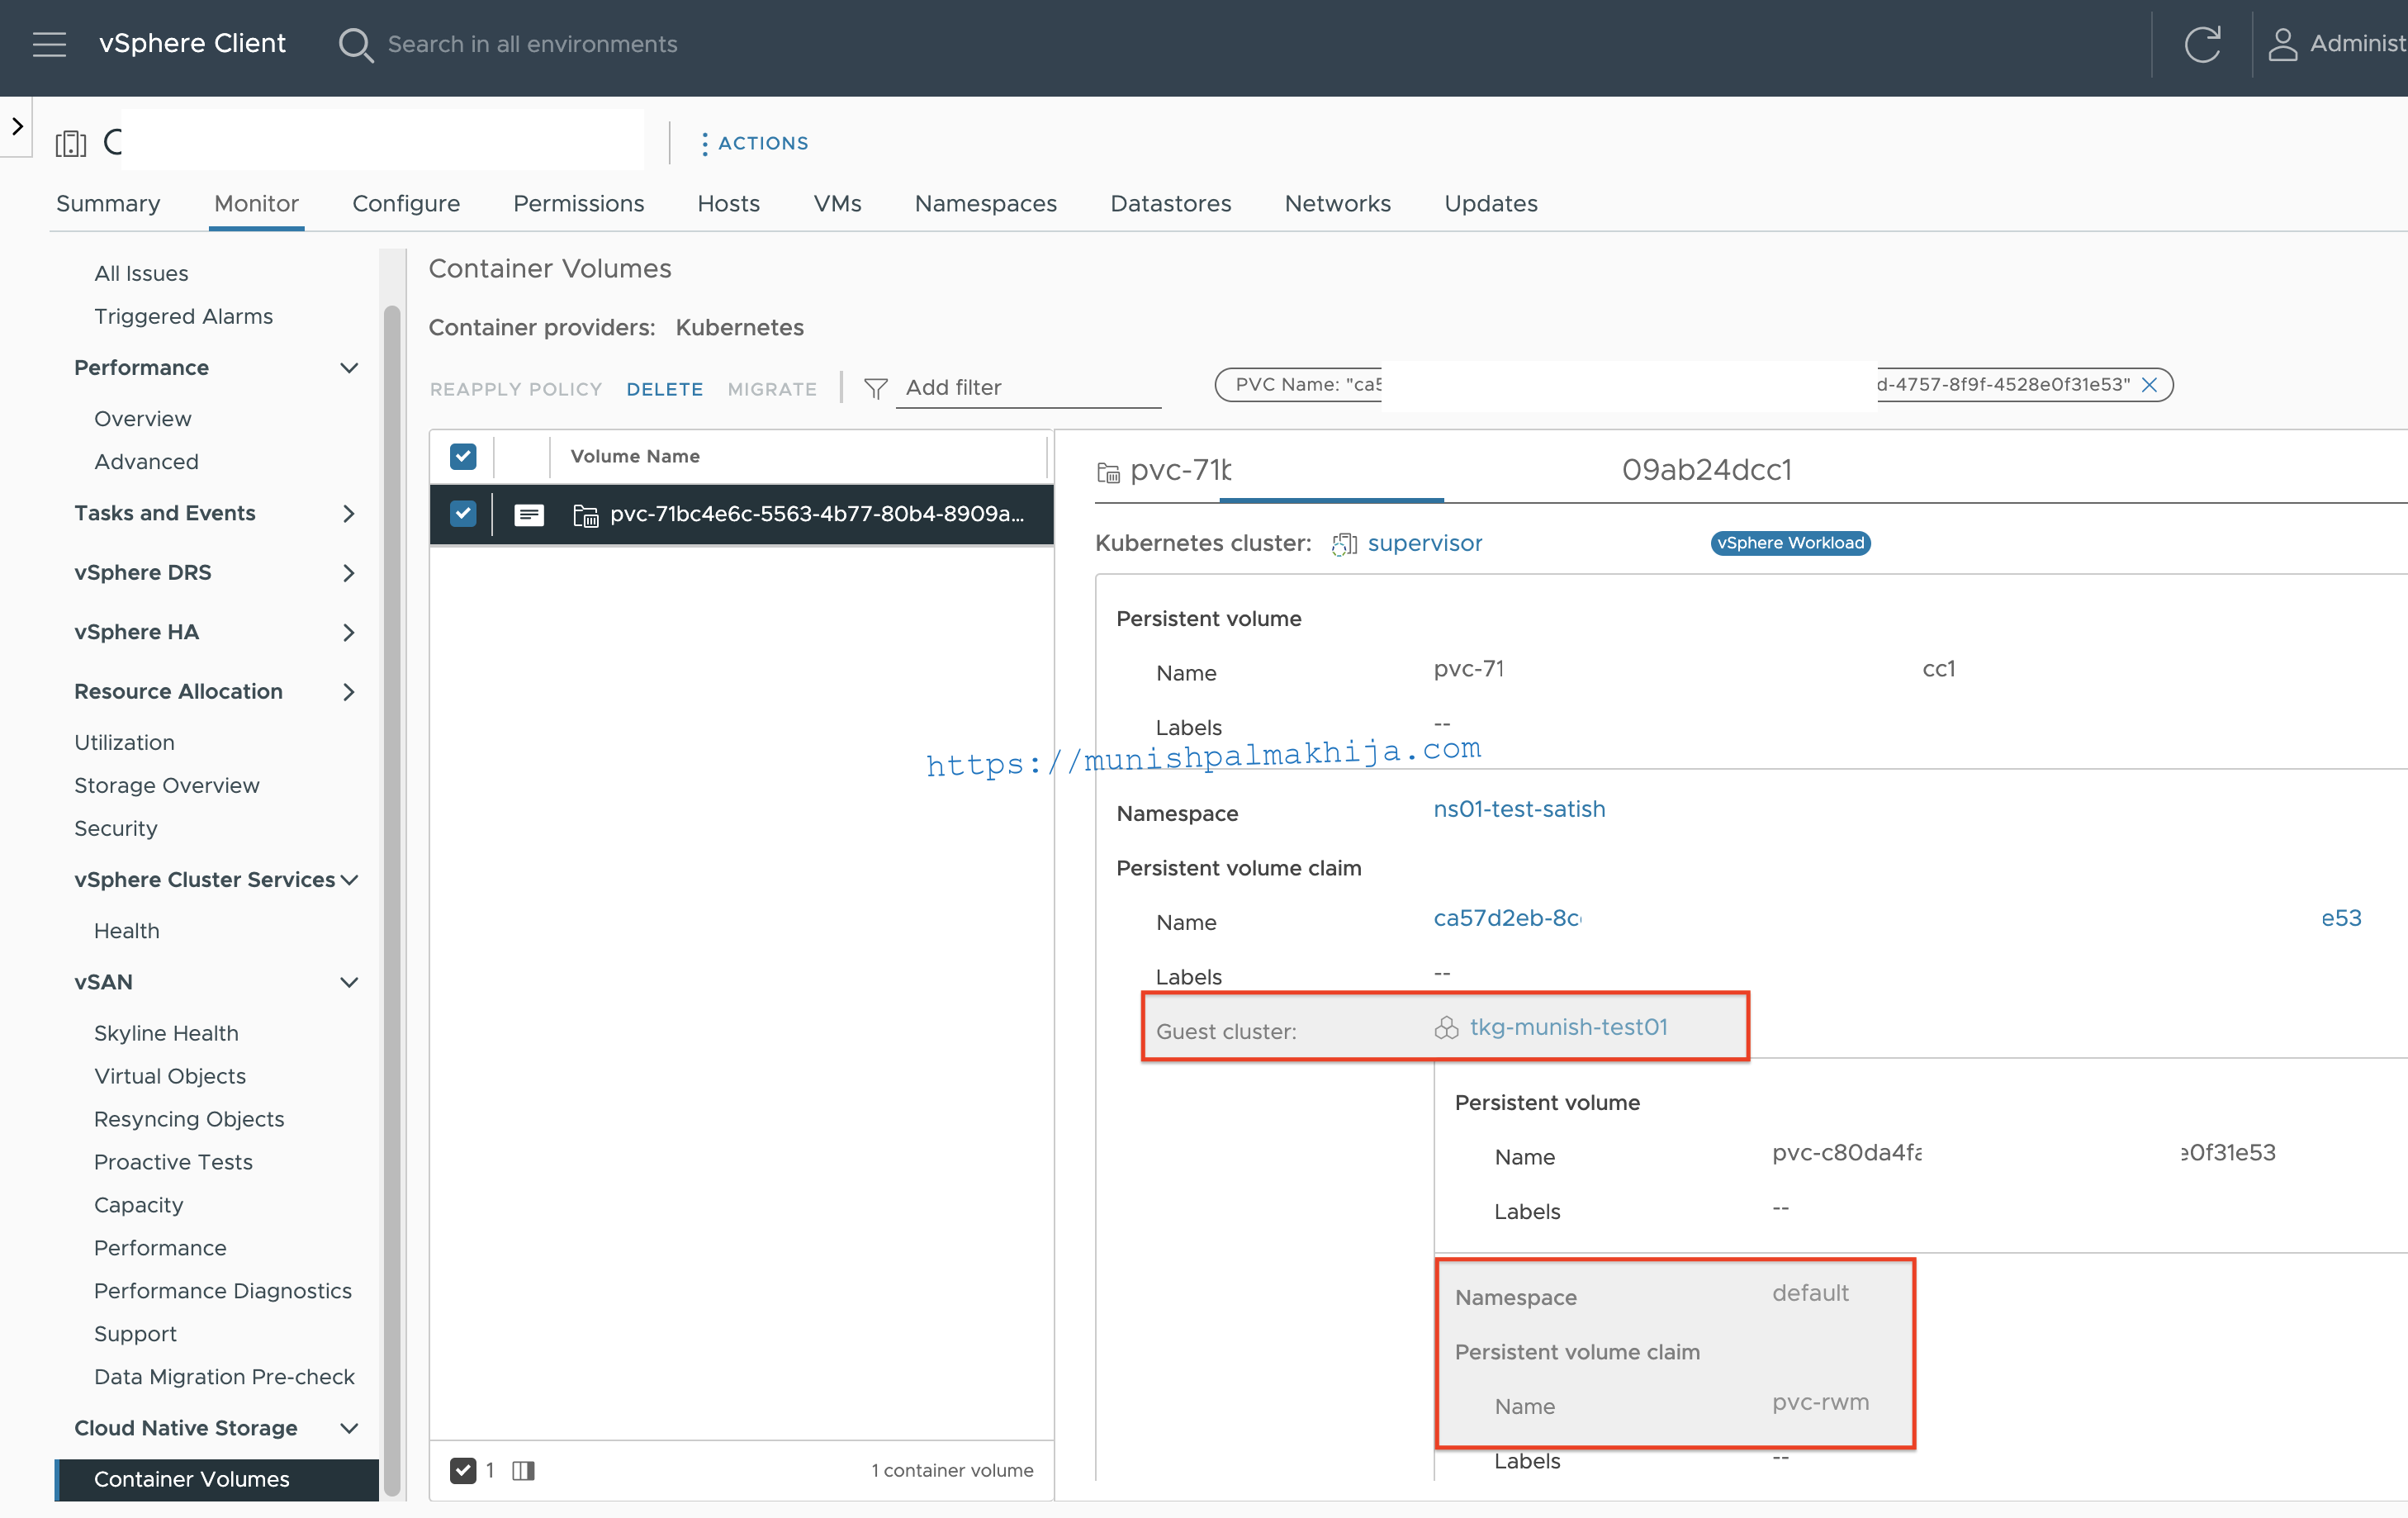
Since this is using the CSI-CNS, the volume can be examined from the vSphere Client.
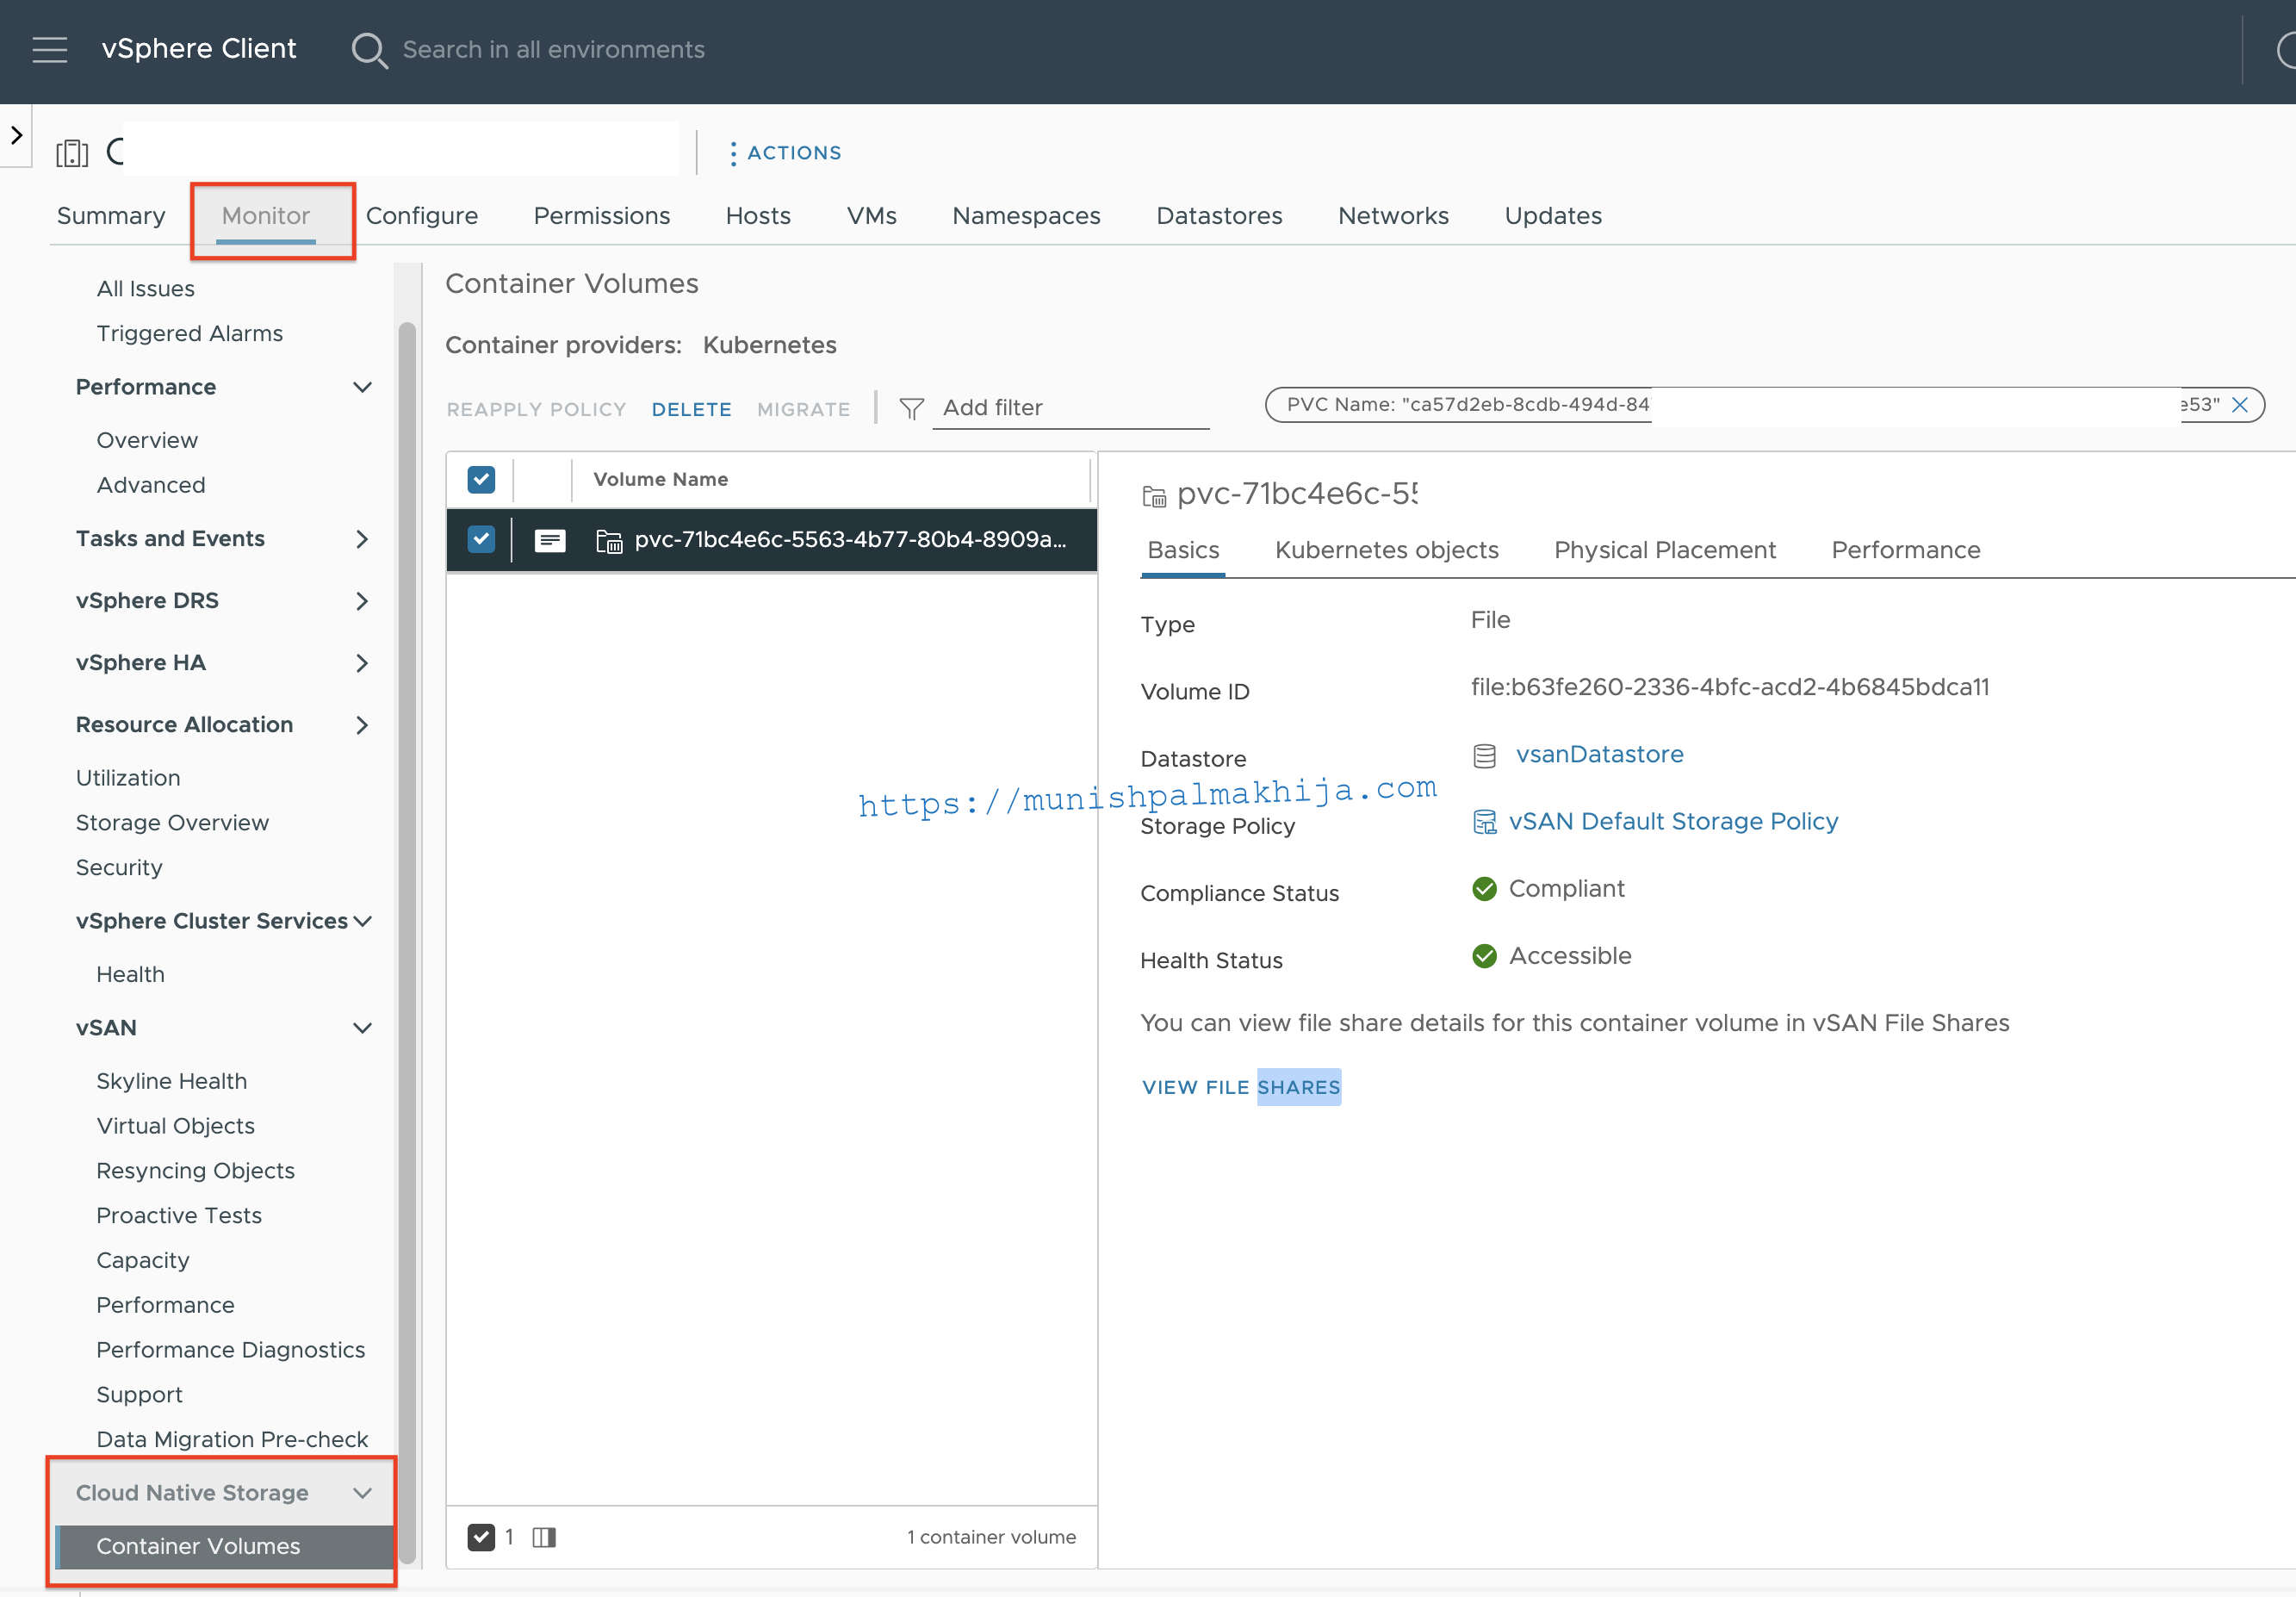
You can also check the performance of the PVC as well which is cool
