Tanzu Data Management Console (TDMC) developer tools provide a way to perform operations programmatically, which can help developers by enabling self-service database provisioning. It includes
- Terraform Provider
- TDMC CLI
- Swagger API
In this blog, I will showcase how a developer/db admin can leverage these automation tools to perform self-service database provisioning
Copy the configs for this blog from the following repo
TDMC Terraform Provider
Step 1 – Create a Terraform file
Navigate to the terraform folder of the repo and copy the file https://github.com/munishpalmakhija/tdmc/blob/main/terraform/main.tf
Step 2 – Configure TDMC Terraform Provider
host = “TDMC_HOST_URL”
type = “user_creds”
username = “TDMC_USERNAME”
password = “TDMCPASSWORD”
Step 3 – Update Dataplane ID
data_plane_id = “DP_ID” #
Step 4 – Specify Postgres Config
Specify the following config related to the PostgreSQL database
Version
Storage Policy Name
PG Cluster Name
PG Cluster Metadata such as DB Name, Username, and Password (I will be leaving it default)
Note – Terraform will create a new network policy named tf-pg-nw-policy, allowing access from anywhere.
Step 5 – Initialize Terraform
terraform init

Step 6 – Terraform Plan
terraform plan

Step 7 – Terraform Apply
terraform apply –auto-approve


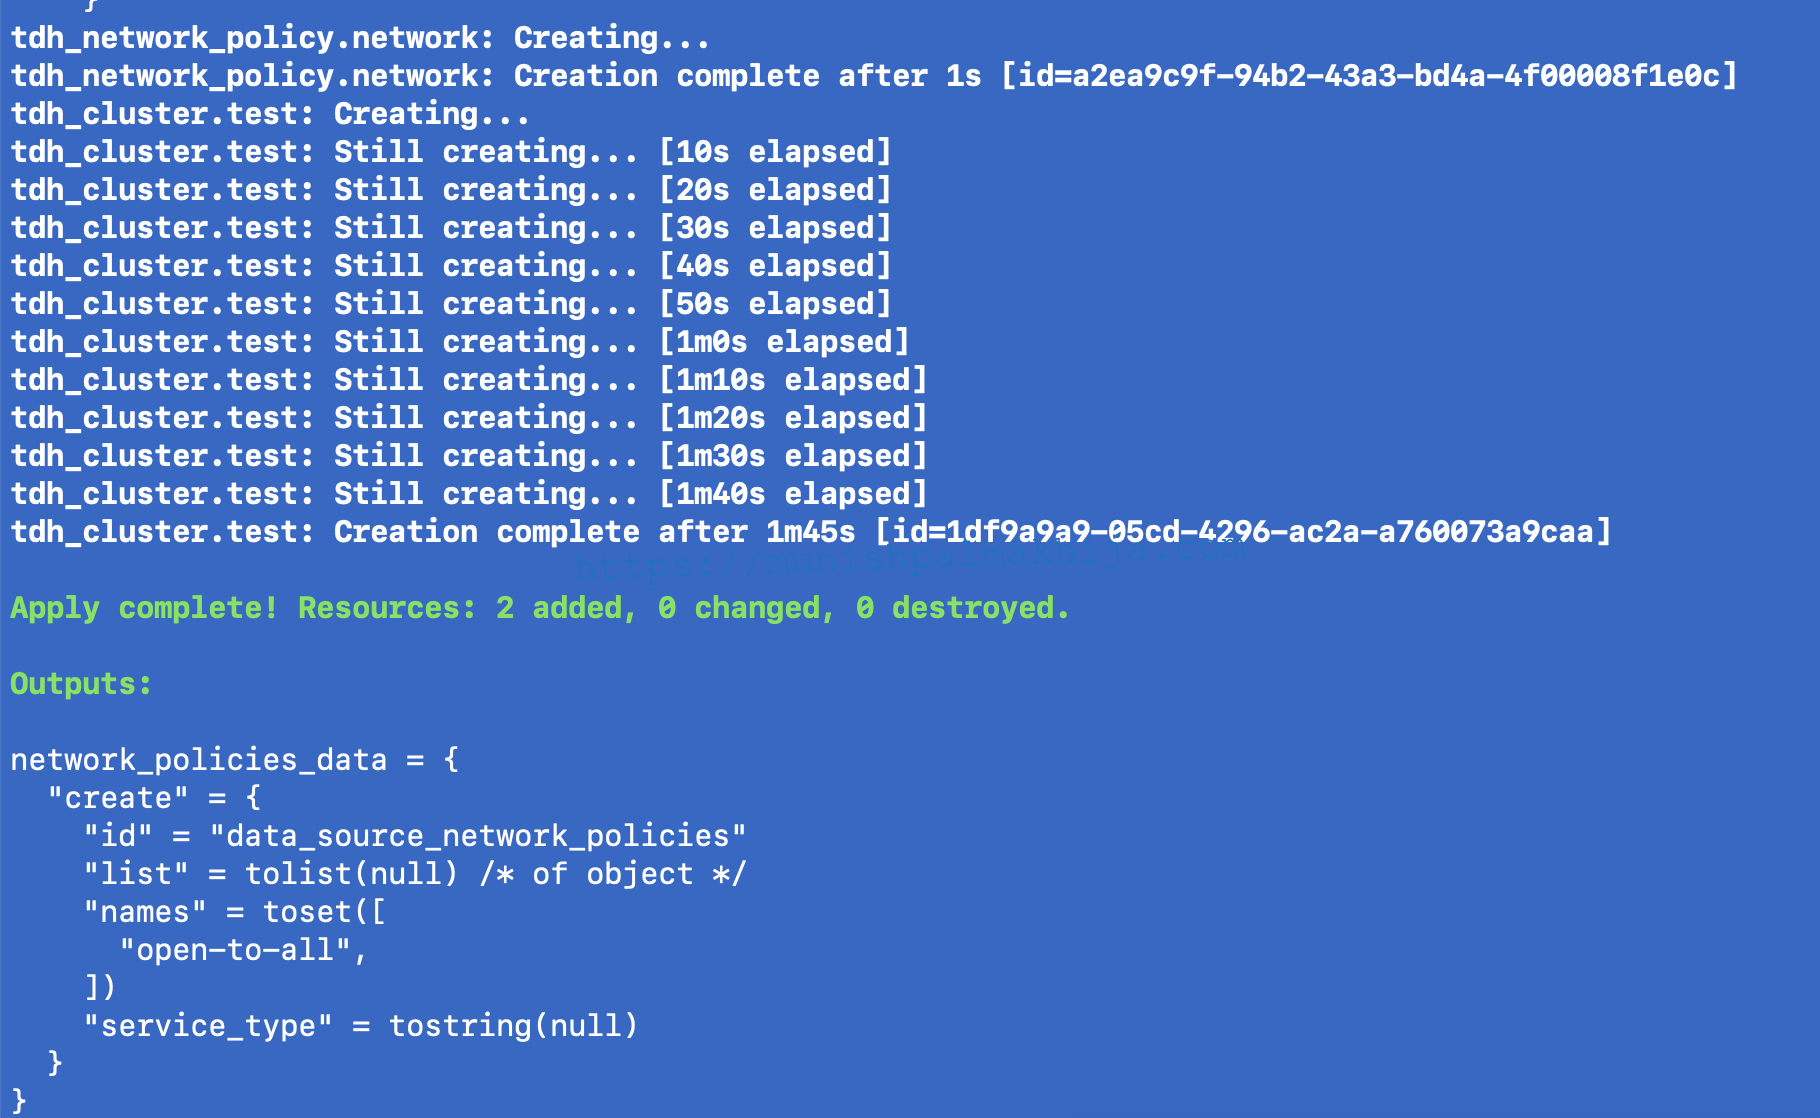
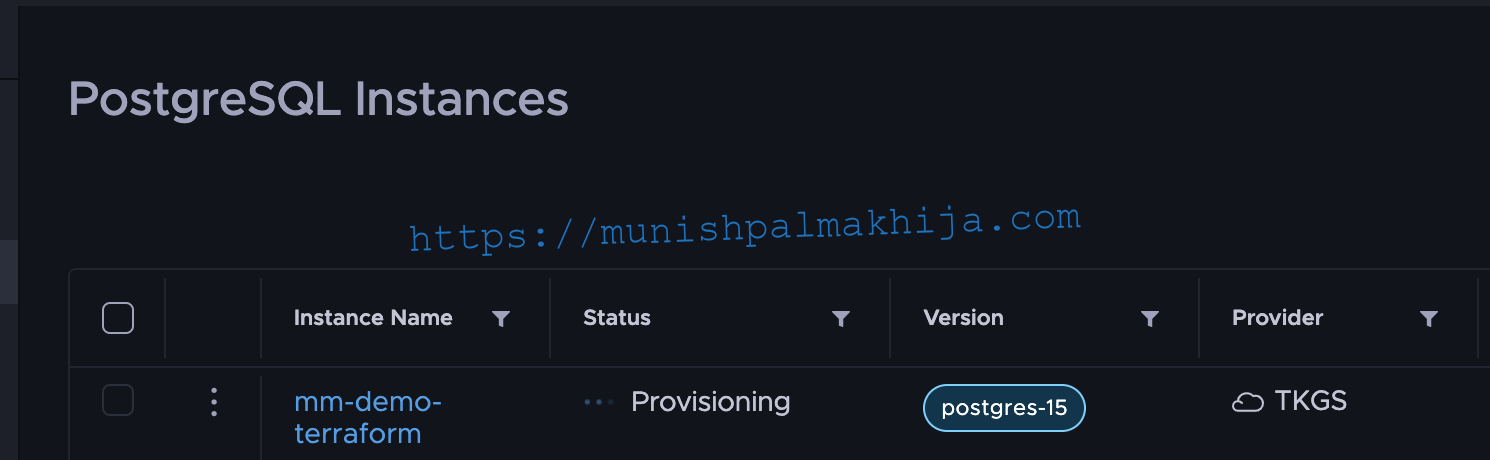
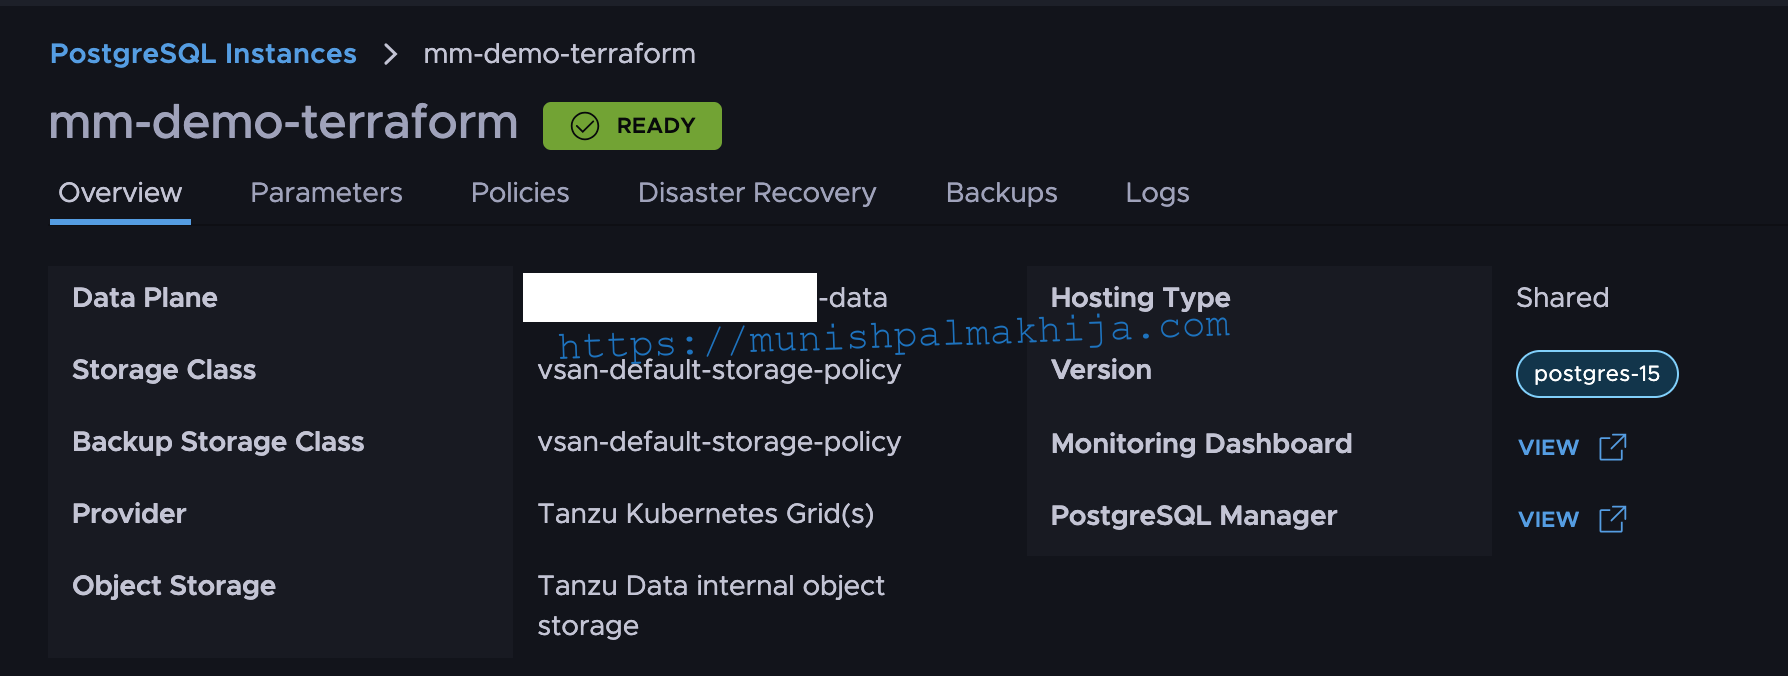
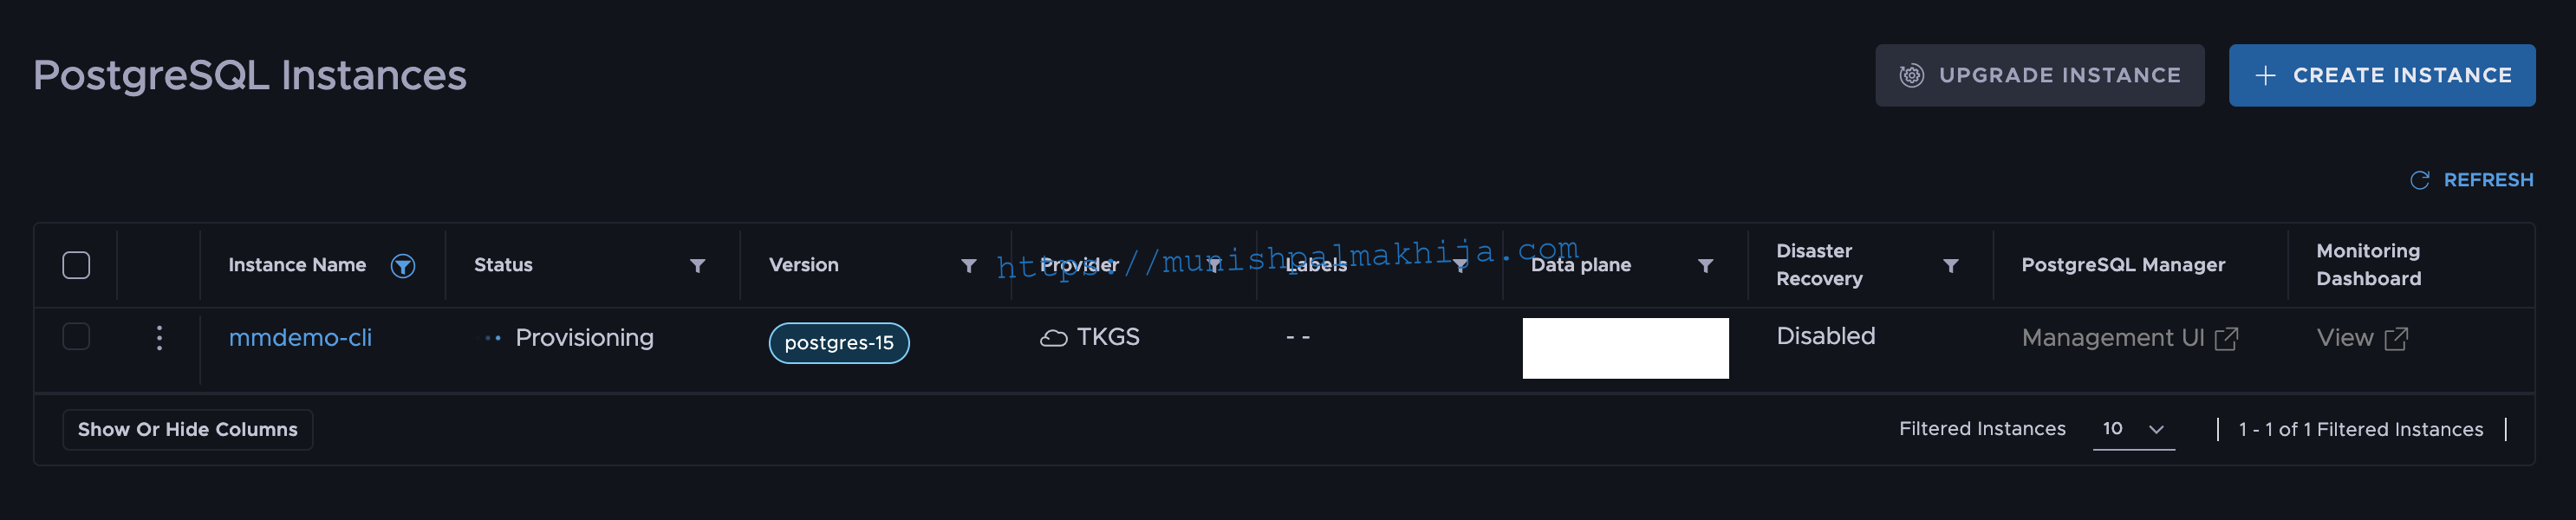
Step 8 – Verify PostgreSQL in TDMC UI
TDMC CLI
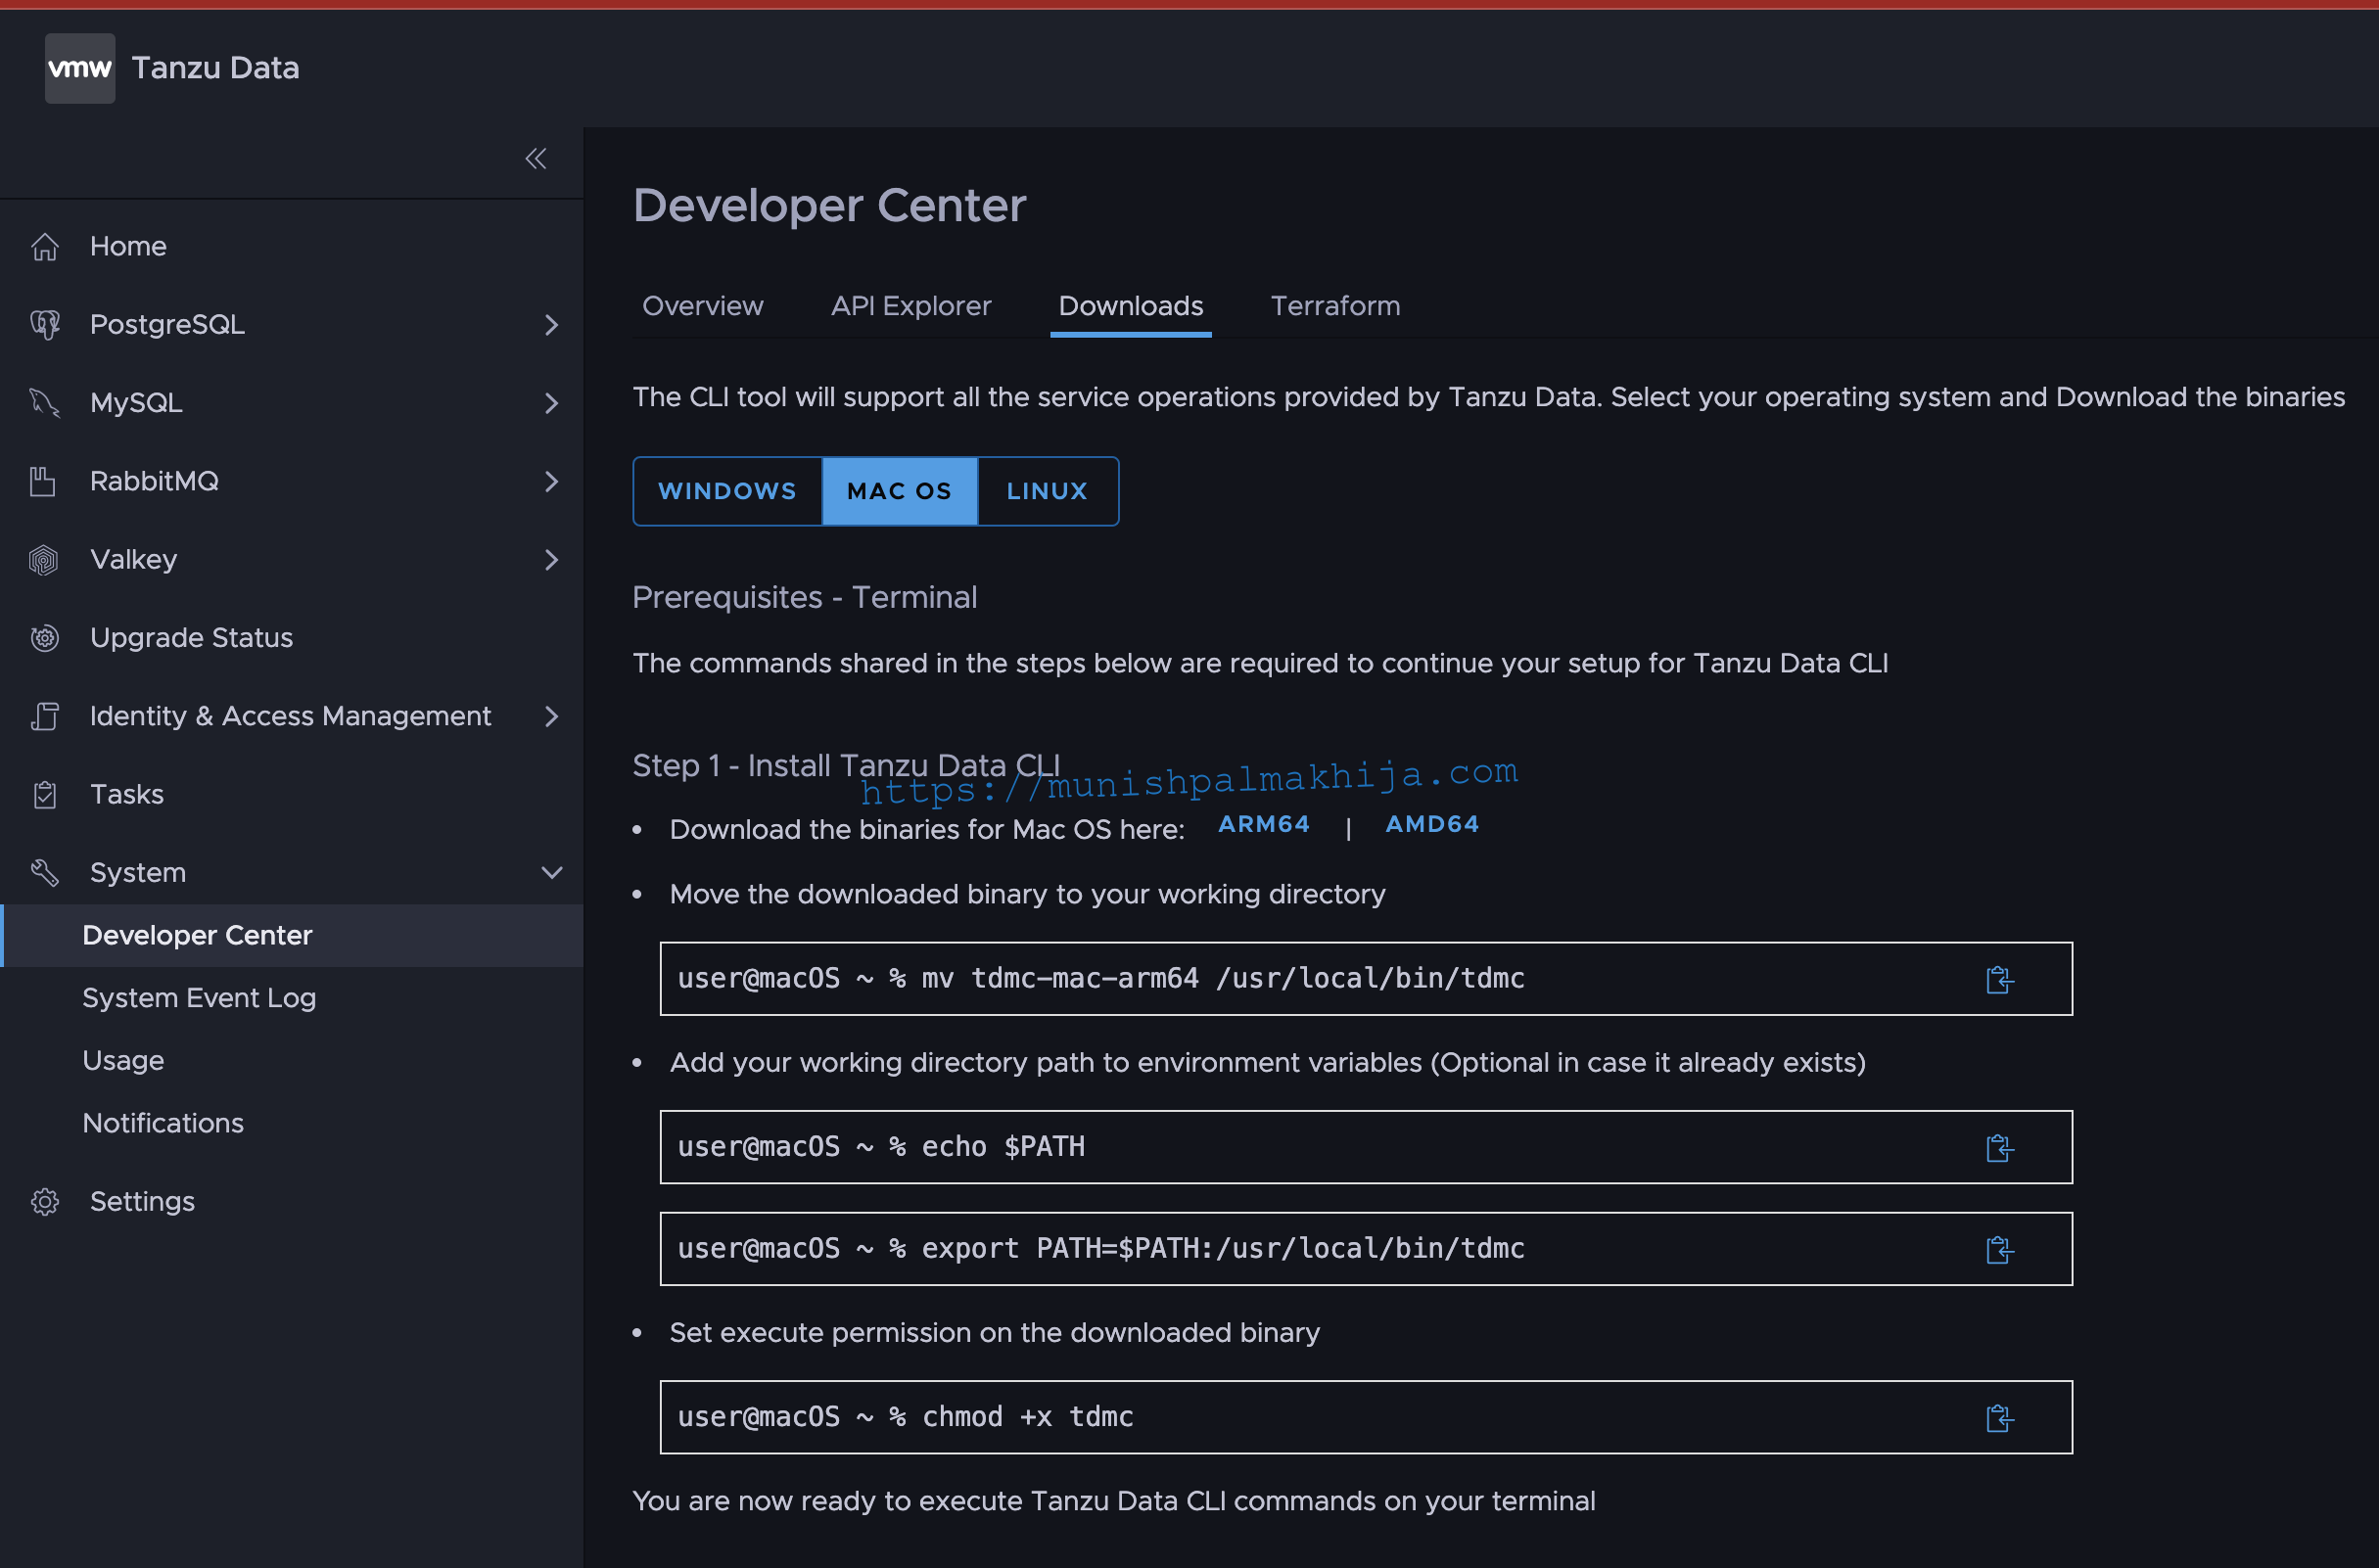
Step 1 – Install TDMC CLI
Log in as SRE User and navigate to Developer Center under System.
Click on the Downloads Tab to download the required binary by clicking on the respective OS tab. In my case ,I will be downloading amd64 binary for macOS
Move the downloaded binary to your working directory & set the execute permissions
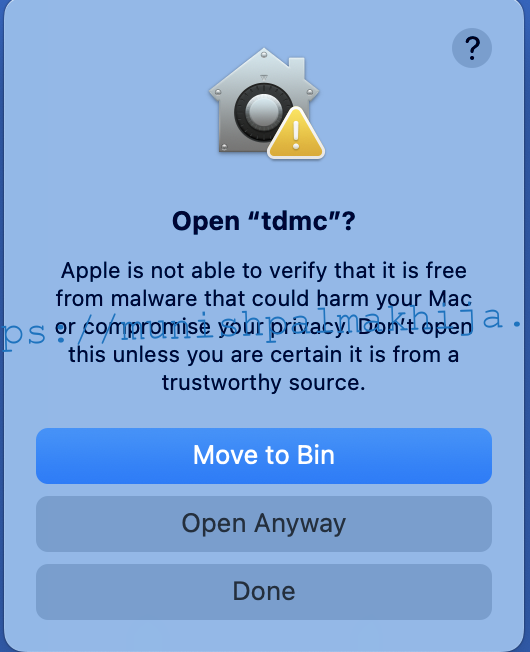
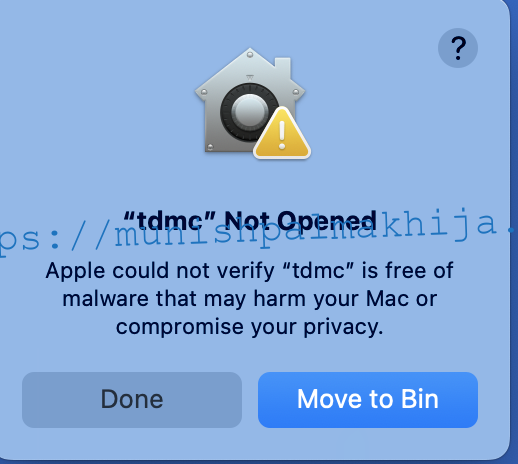
In case you run into the following error on Mac. You will need to allow the application under Privacy & Security in System Settings

Step 2 – Create Profile
To use the tdmc CLI, you need to create a CLI profile by executing the following command
tdmc profile create
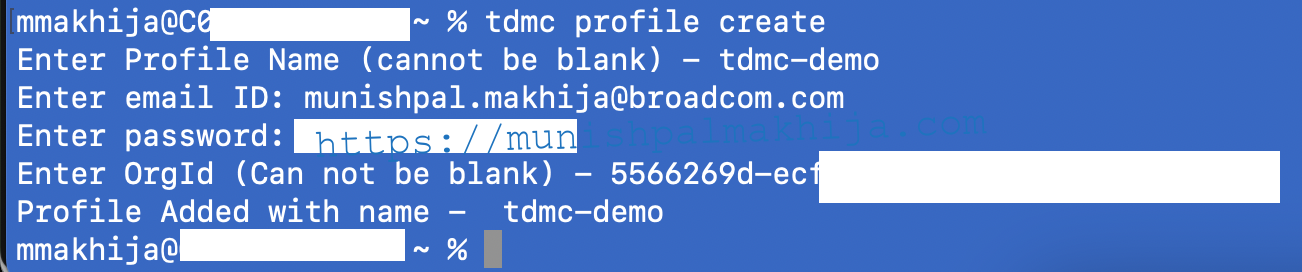
Note – Org is for the mm-demo org, which we created in my previous blog
Step 3 – Configue CLI
tdmc configure

Step 4 – Export Profile Password
Store your profile password in your local environment:
export TDMC_PASSWORD='<PROFILE-PASSWORD>’
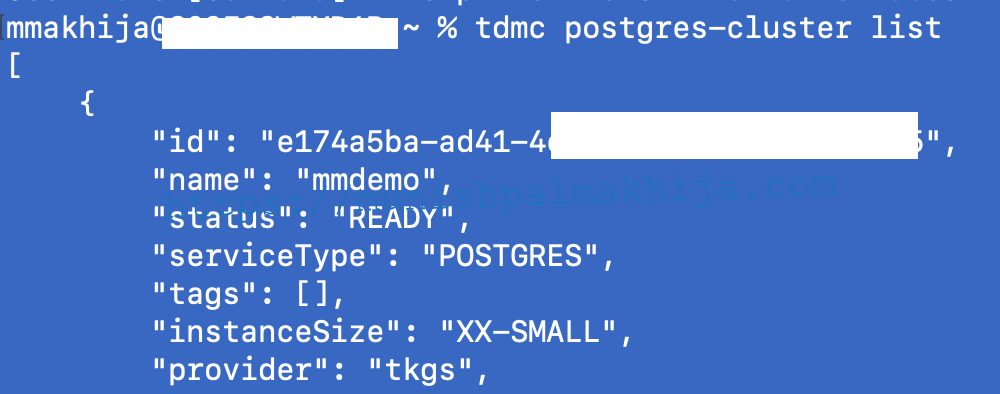
Step 5 – Verify
You can now verify if you can execute cli commands against the environment.
Below I listing my existing Postgres Cluster, which I deployed in my previous blog
tdmc postgres-cluster list
Step 6 – Create PostgreSQL Cluster using yaml file
Copy the same payload from the repo shared above and update the following values https://github.com/munishpalmakhija/tdmc/blob/main/cli/tdmc_cli_postgre_payload.json
- Sample
- Provider –
- Dataplane ID
- NetworkPolicies
- Version
tdmc postgres-cluster create -p <provider> -f <yaml_file_path>
Step 7 – Verify PostgreSQL Cluster Creation Status
tdmc task get –id xxx
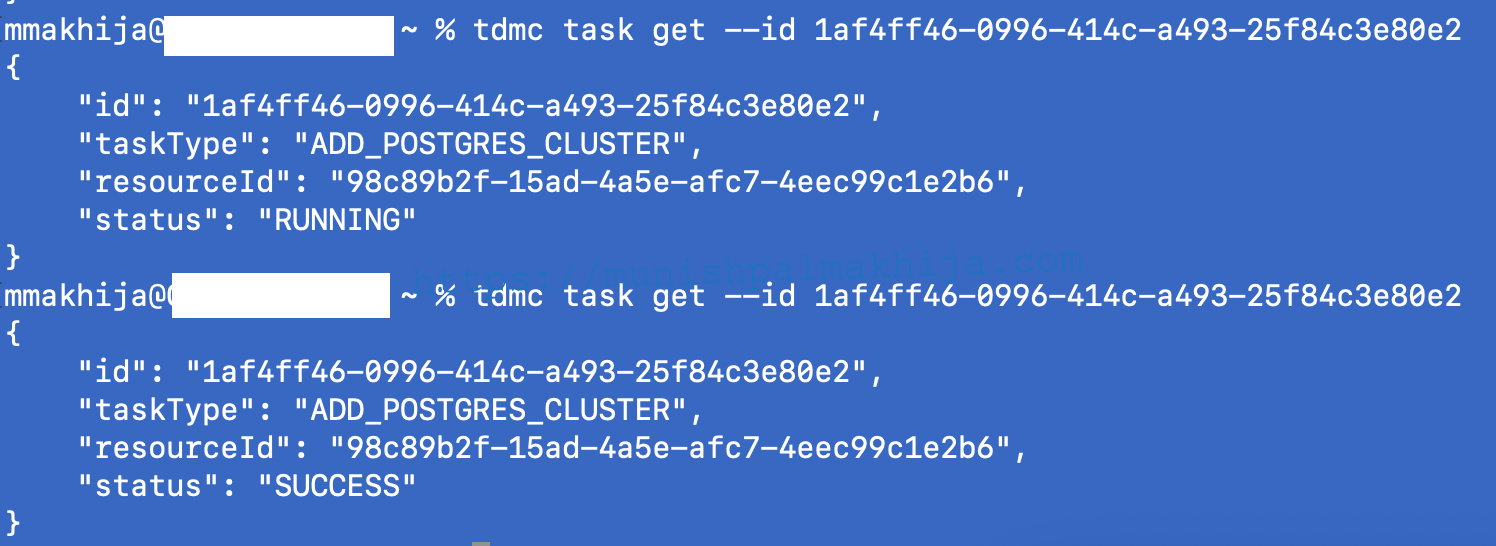
You can also check the UI for the current status
TDMC API
TDMC has Swagger-based APIs, which can also be leveraged for automation.
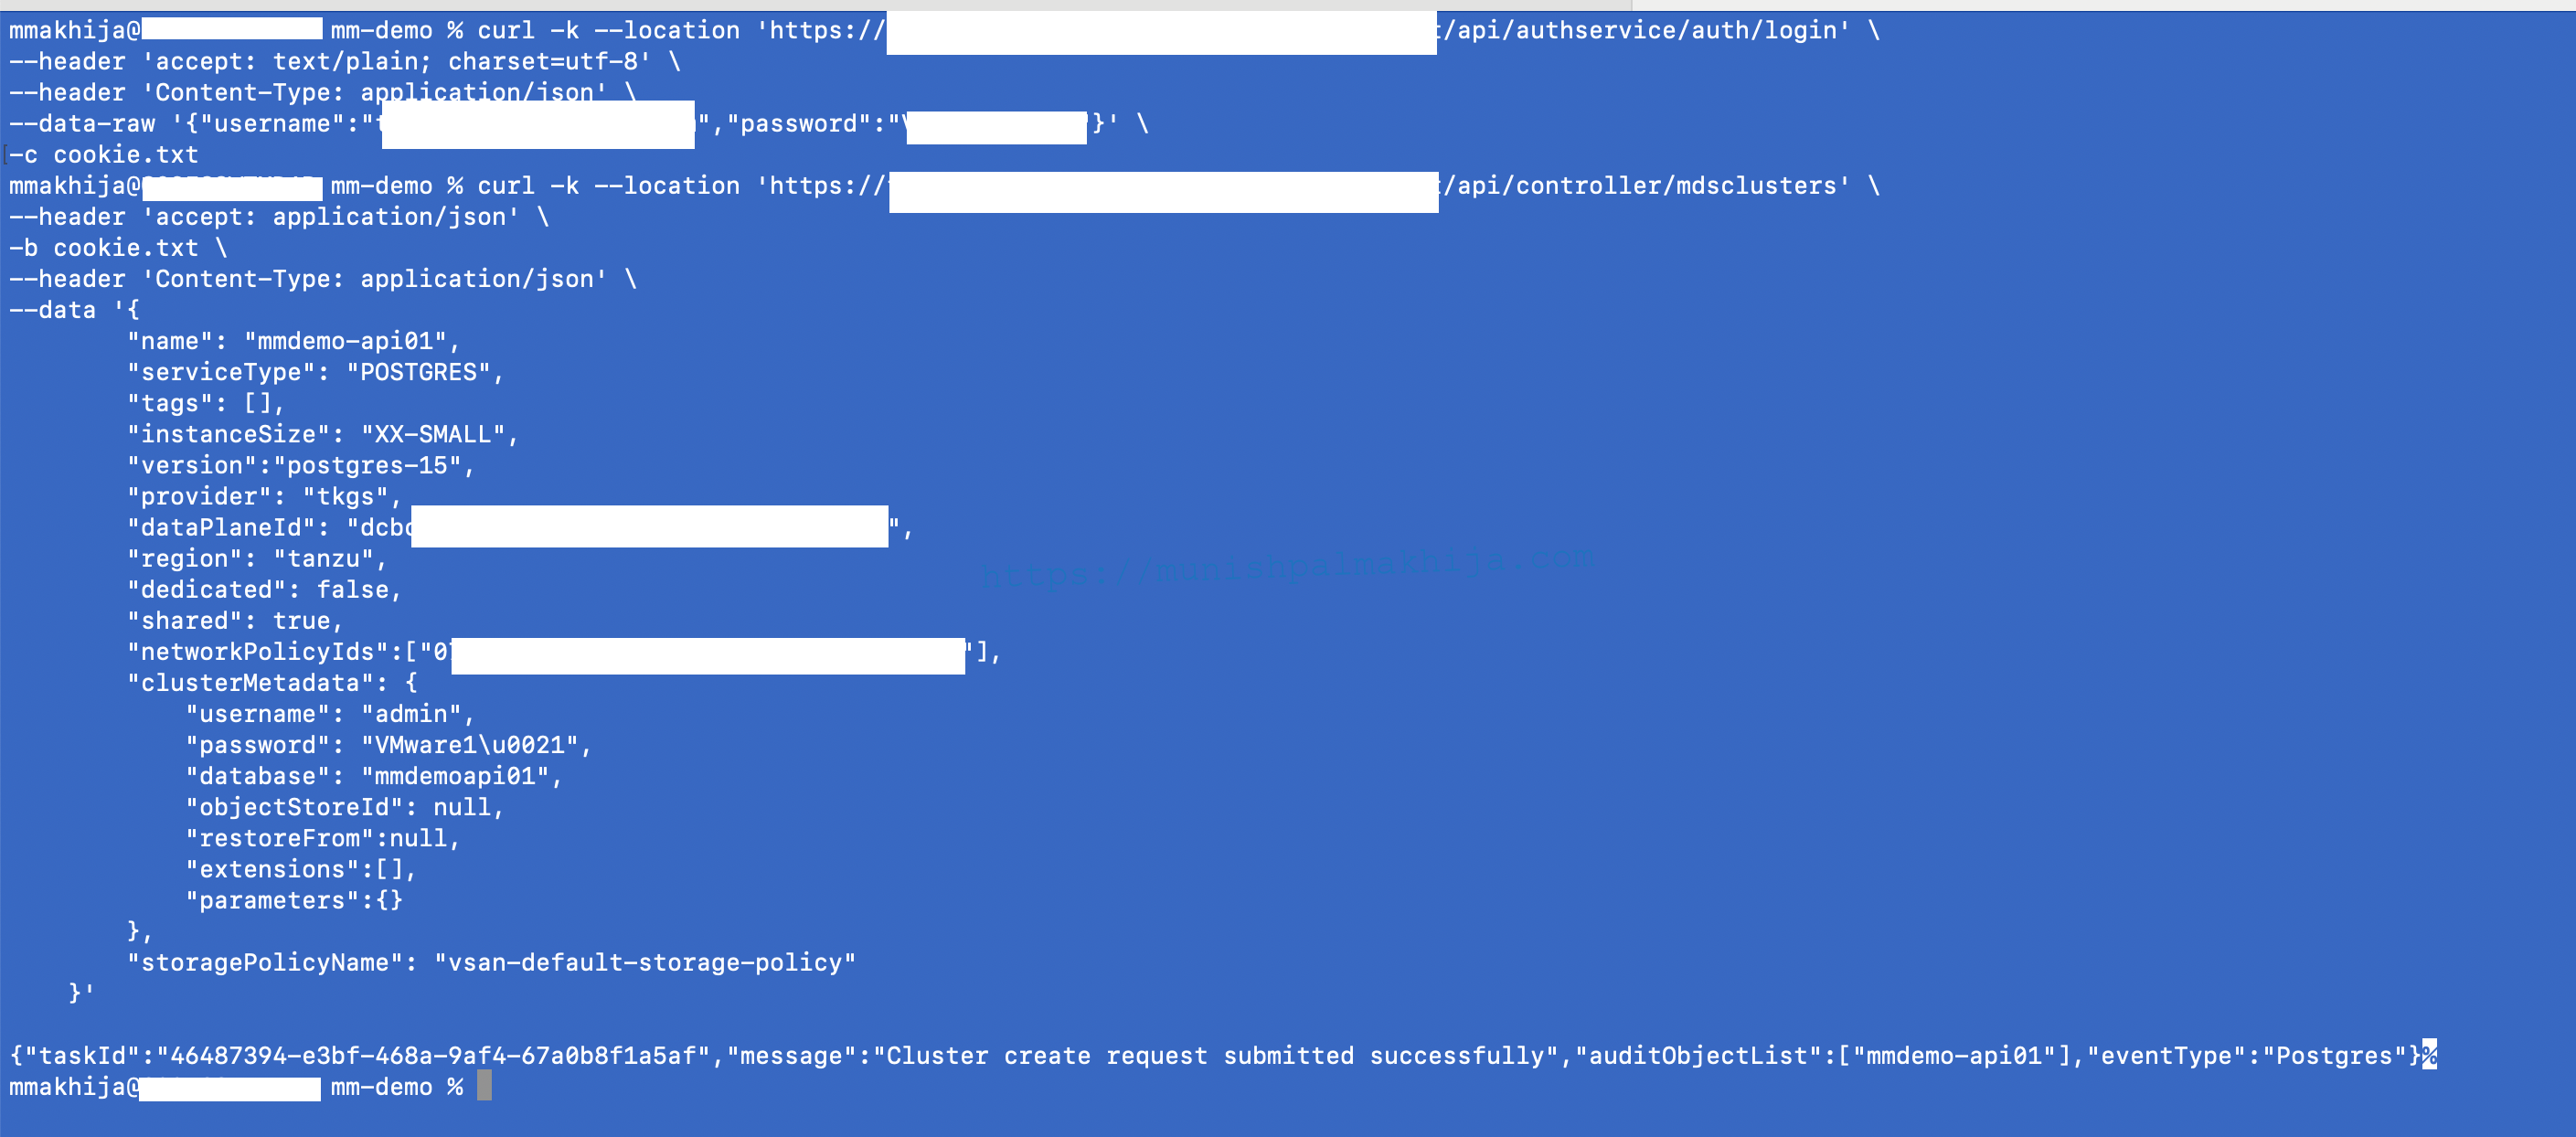
Step 1 – Login
Log in with the Org Admin Credentials
curl -k –location ‘https://<tdmc_host>/api/authservice/auth/login’ \
–header ‘accept: text/plain; charset=utf-8’ \
–header ‘Content-Type: application/json’ \
–data-raw ‘{“username”:”<tdmc_org_admin_username>”,”password”:”<tdmc_org_admin_pass>”}’ \
-c cookie.txt
Step 2 – Create Postgres Cluster via TDMC API
Execute the following API to create a PostgreSQL Cluster
Use the Request body from the repo shared above and update the following values https://github.com/munishpalmakhija/tdmc/blob/main/api/tdmc_api_postgres_request_body.json
- Sample
- Provider –
- Dataplane ID
- NetworkPolicies
- Version
curl -k –location ‘https://<tdmc_host>/api/controller/mdsclusters’ \
–header ‘accept: application/json’ \
-b cookie.txt \
–header ‘Content-Type: application/json’ \
–data ‘{
“name”: “<postgres_cluster_name>”,
“serviceType”: “POSTGRES”,
“tags”: [],
“instanceSize”: “XX-SMALL”,
“version”:”postgres-15″,
“provider”: “tkgs”,
“dataPlaneId”: “<dataplaneid>”,
“region”: “tanzu”,
“dedicated”: false,
“shared”: true,
“networkPolicyIds”:[“<network_policy_id>”],
“clusterMetadata”: {
“username”: “<postgres_db_user>”,
“password”: “<postgres_db_pass>”,
“database”: “<postgres_db_name>”,
“objectStoreId”: null,
“restoreFrom”:null,
“extensions”:[],
“parameters”:{}
},
“storagePolicyName”: “vsan-default-storage-policy”
}’
Once executed, you should see a response with taskId. This is similar to the ID we got using the CLI method.
Conclusion
TDMC allows customers to rapidly deploy customized databases to increase the velocity, and by providing industry-standard automation tools, it can be integrated into the existing pipeline framework that customers are already using it.
Provisioning PostgreSQL Database with Tanzu Data Management Console